 Small Technical Blog
Vintage Internet Radio
Make a broken vintage radio both beautiful and functional again.
I got the privilege to inherite a wonderful antique radio from the 1930s, which belonged to my great-grandmother. It wasn’t precisely in a good state, but the exterior could for sure be restored and the interior could be replaced by a newer radio device, to have it playing music again.
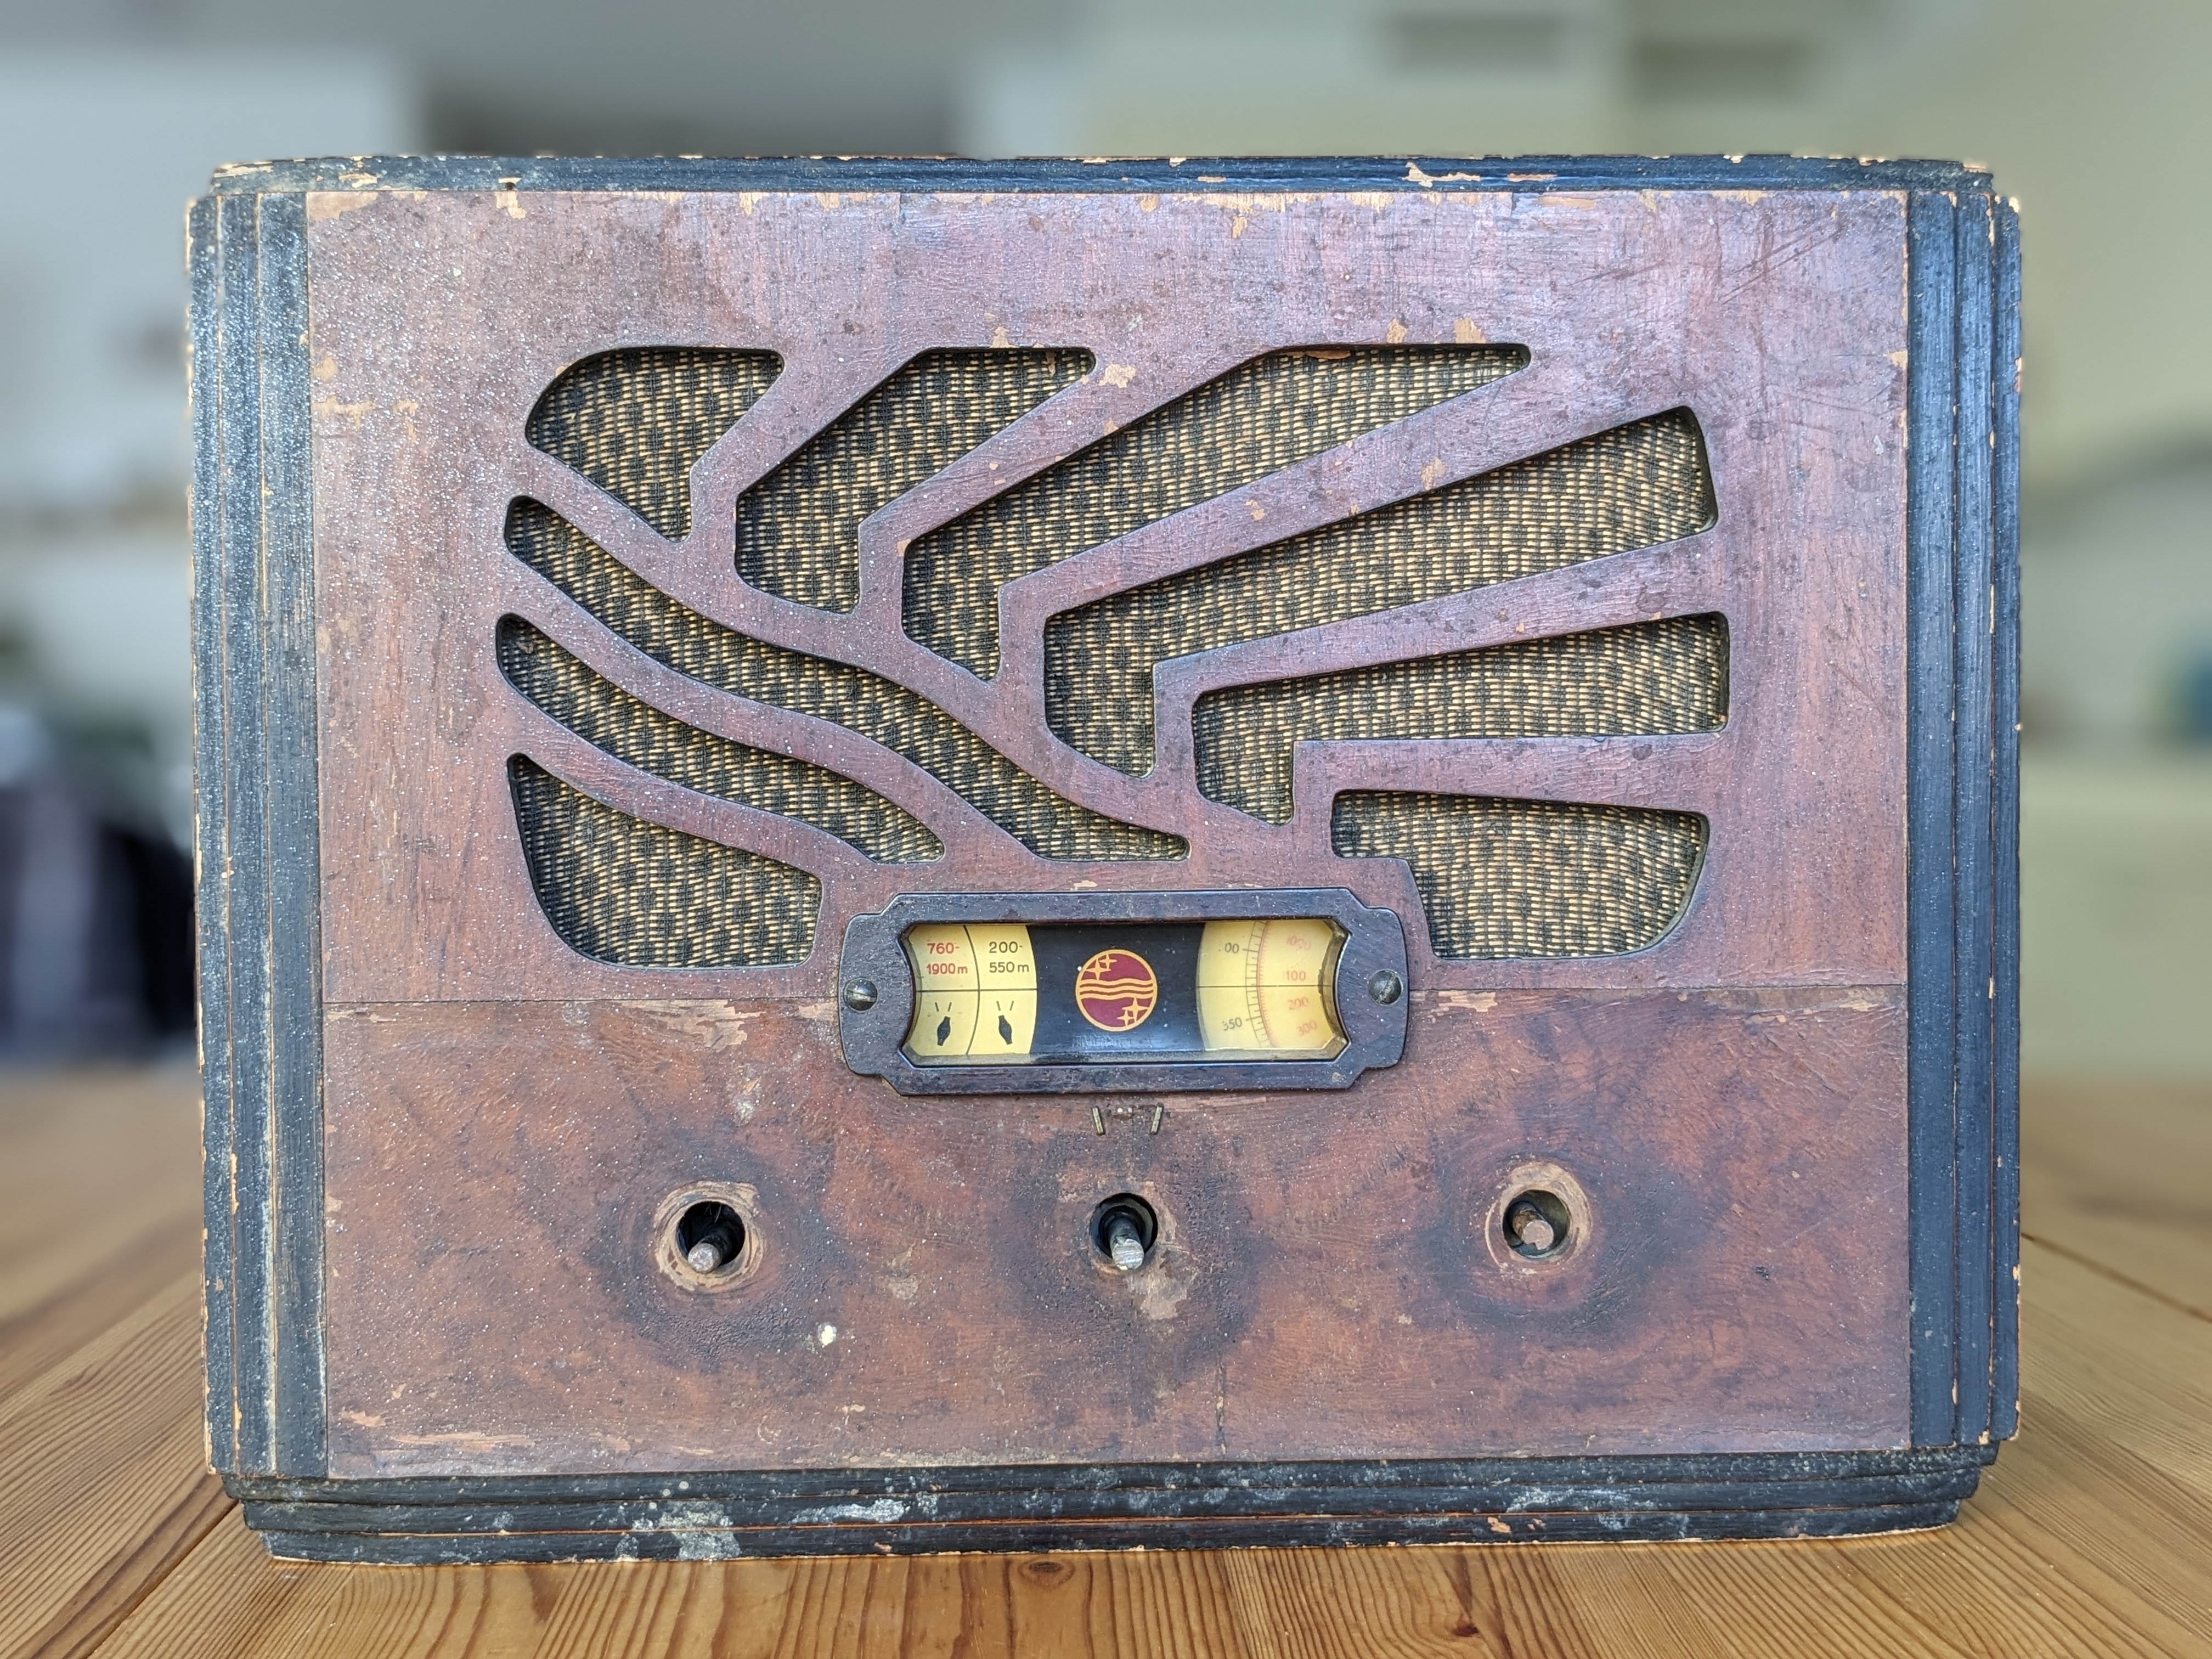
It’s a beauty, isn’t it?
The original radio was unfortunately beyond repair, at least for my knowledge and possibilities:
- Most of the internal components were burnt or broken.
- You can’t attach this device to the modern electric network. Old devices didn’t have a transformator and worked with very high voltage.
So the goal would be to build a new internet radio inside the refurbished old one.
This looked like a long project, so starting for the beginning - divide et impera - I defined the different work tracks:
- Research Original Radio: do a little research about the original radio, try to find the original model online.
- Raspberry Pi Lyrion Server: build a little internet radio from a small single board computer.
- Hifi Berry: add a digital to analog converter / amplifier.
- Controls: make the original wheels and switch work as the radio controls (on/off and volume).
- Speakers: the original speaker would likely need to be replaced.
- Restoration and montage: restorate the wooden case and mount the new little radio inside the old one.
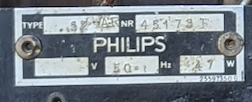
A little plaque inside the radio told me it is a Philips, the exact model number was a little bit difficult to read (it’s “52 AR”, if you look closely):
After some intensive googling, in the Radio Museum website, I was thrilled to find an old Philips advertisement from year 1936. And there it was, the Philips 521 AR, looking exactly like ours.
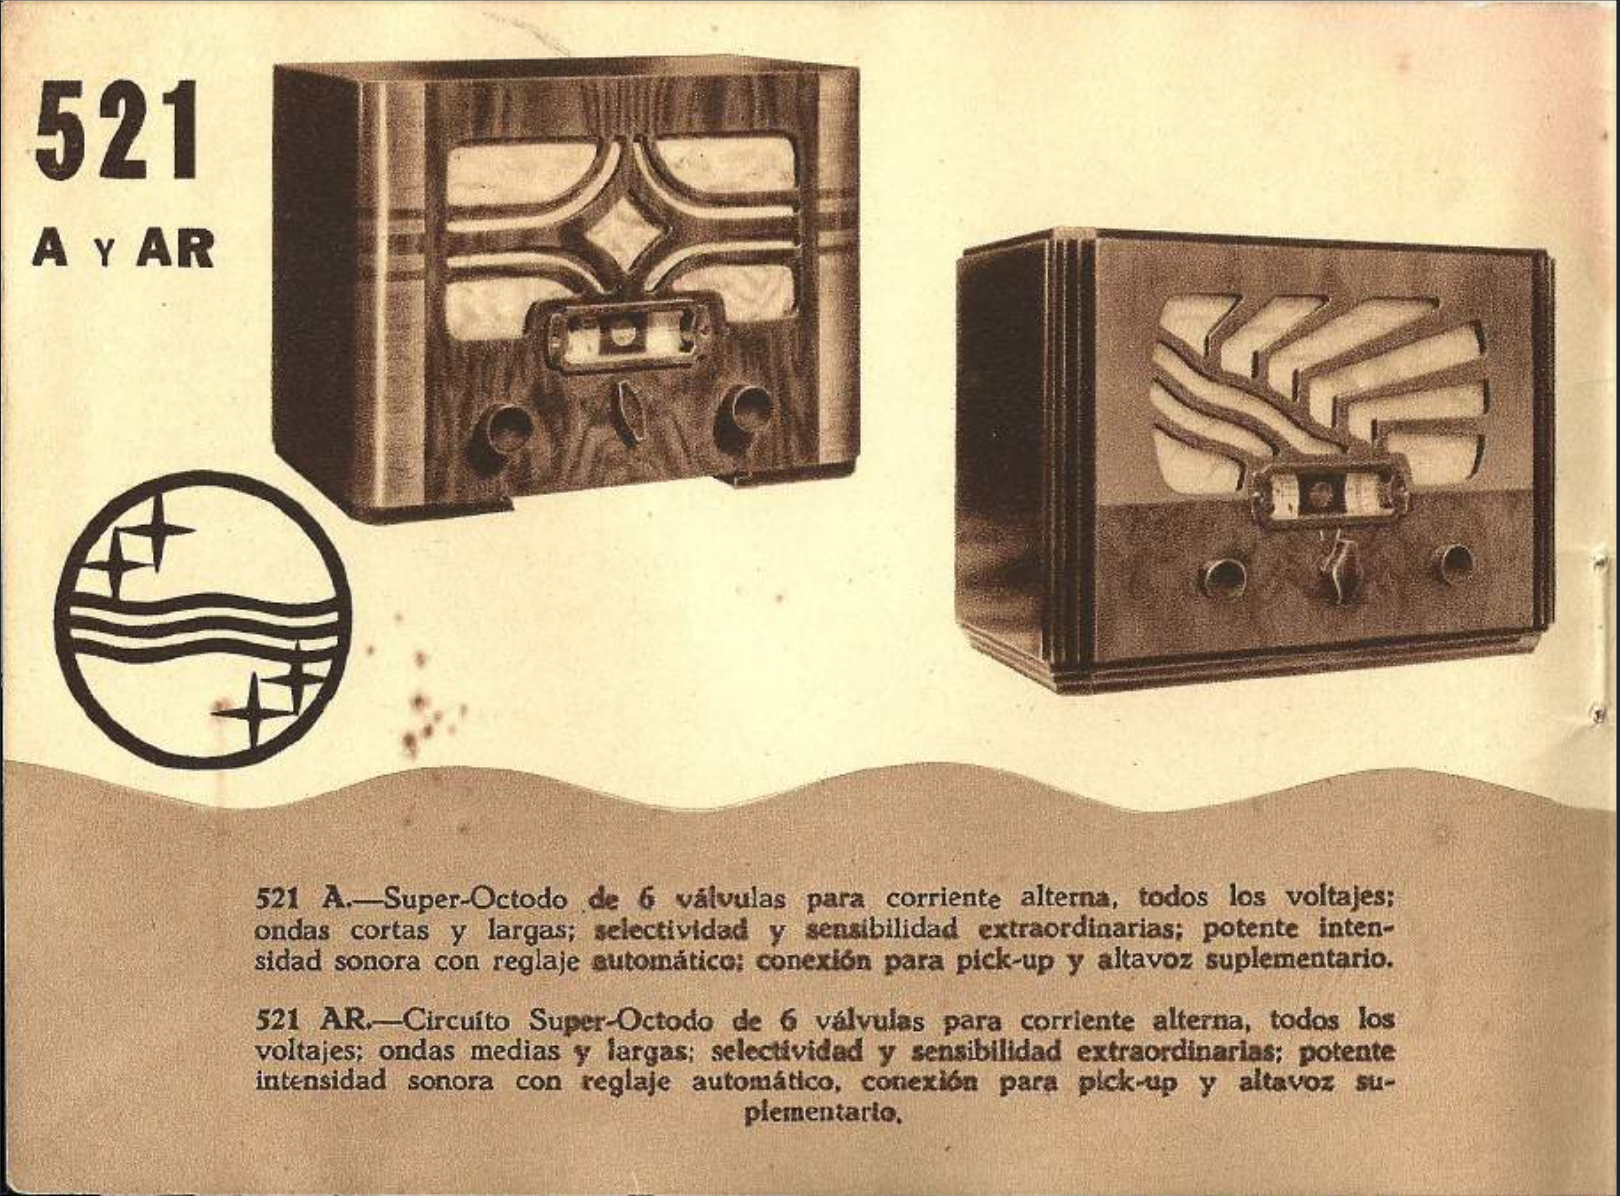
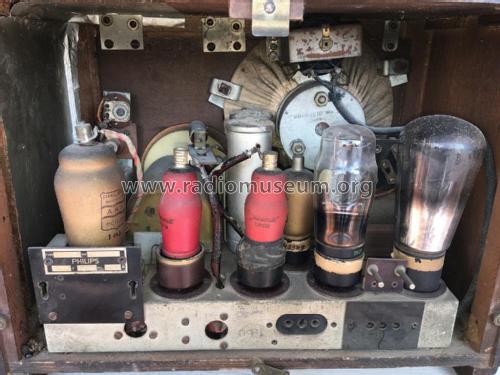
Navigating a little bit more through the same website, I found a photograph of the original inside of the radio. According to the website, the radio dates from year 1935 and costed 495 spanish Pesetas back then, which was a fortune.
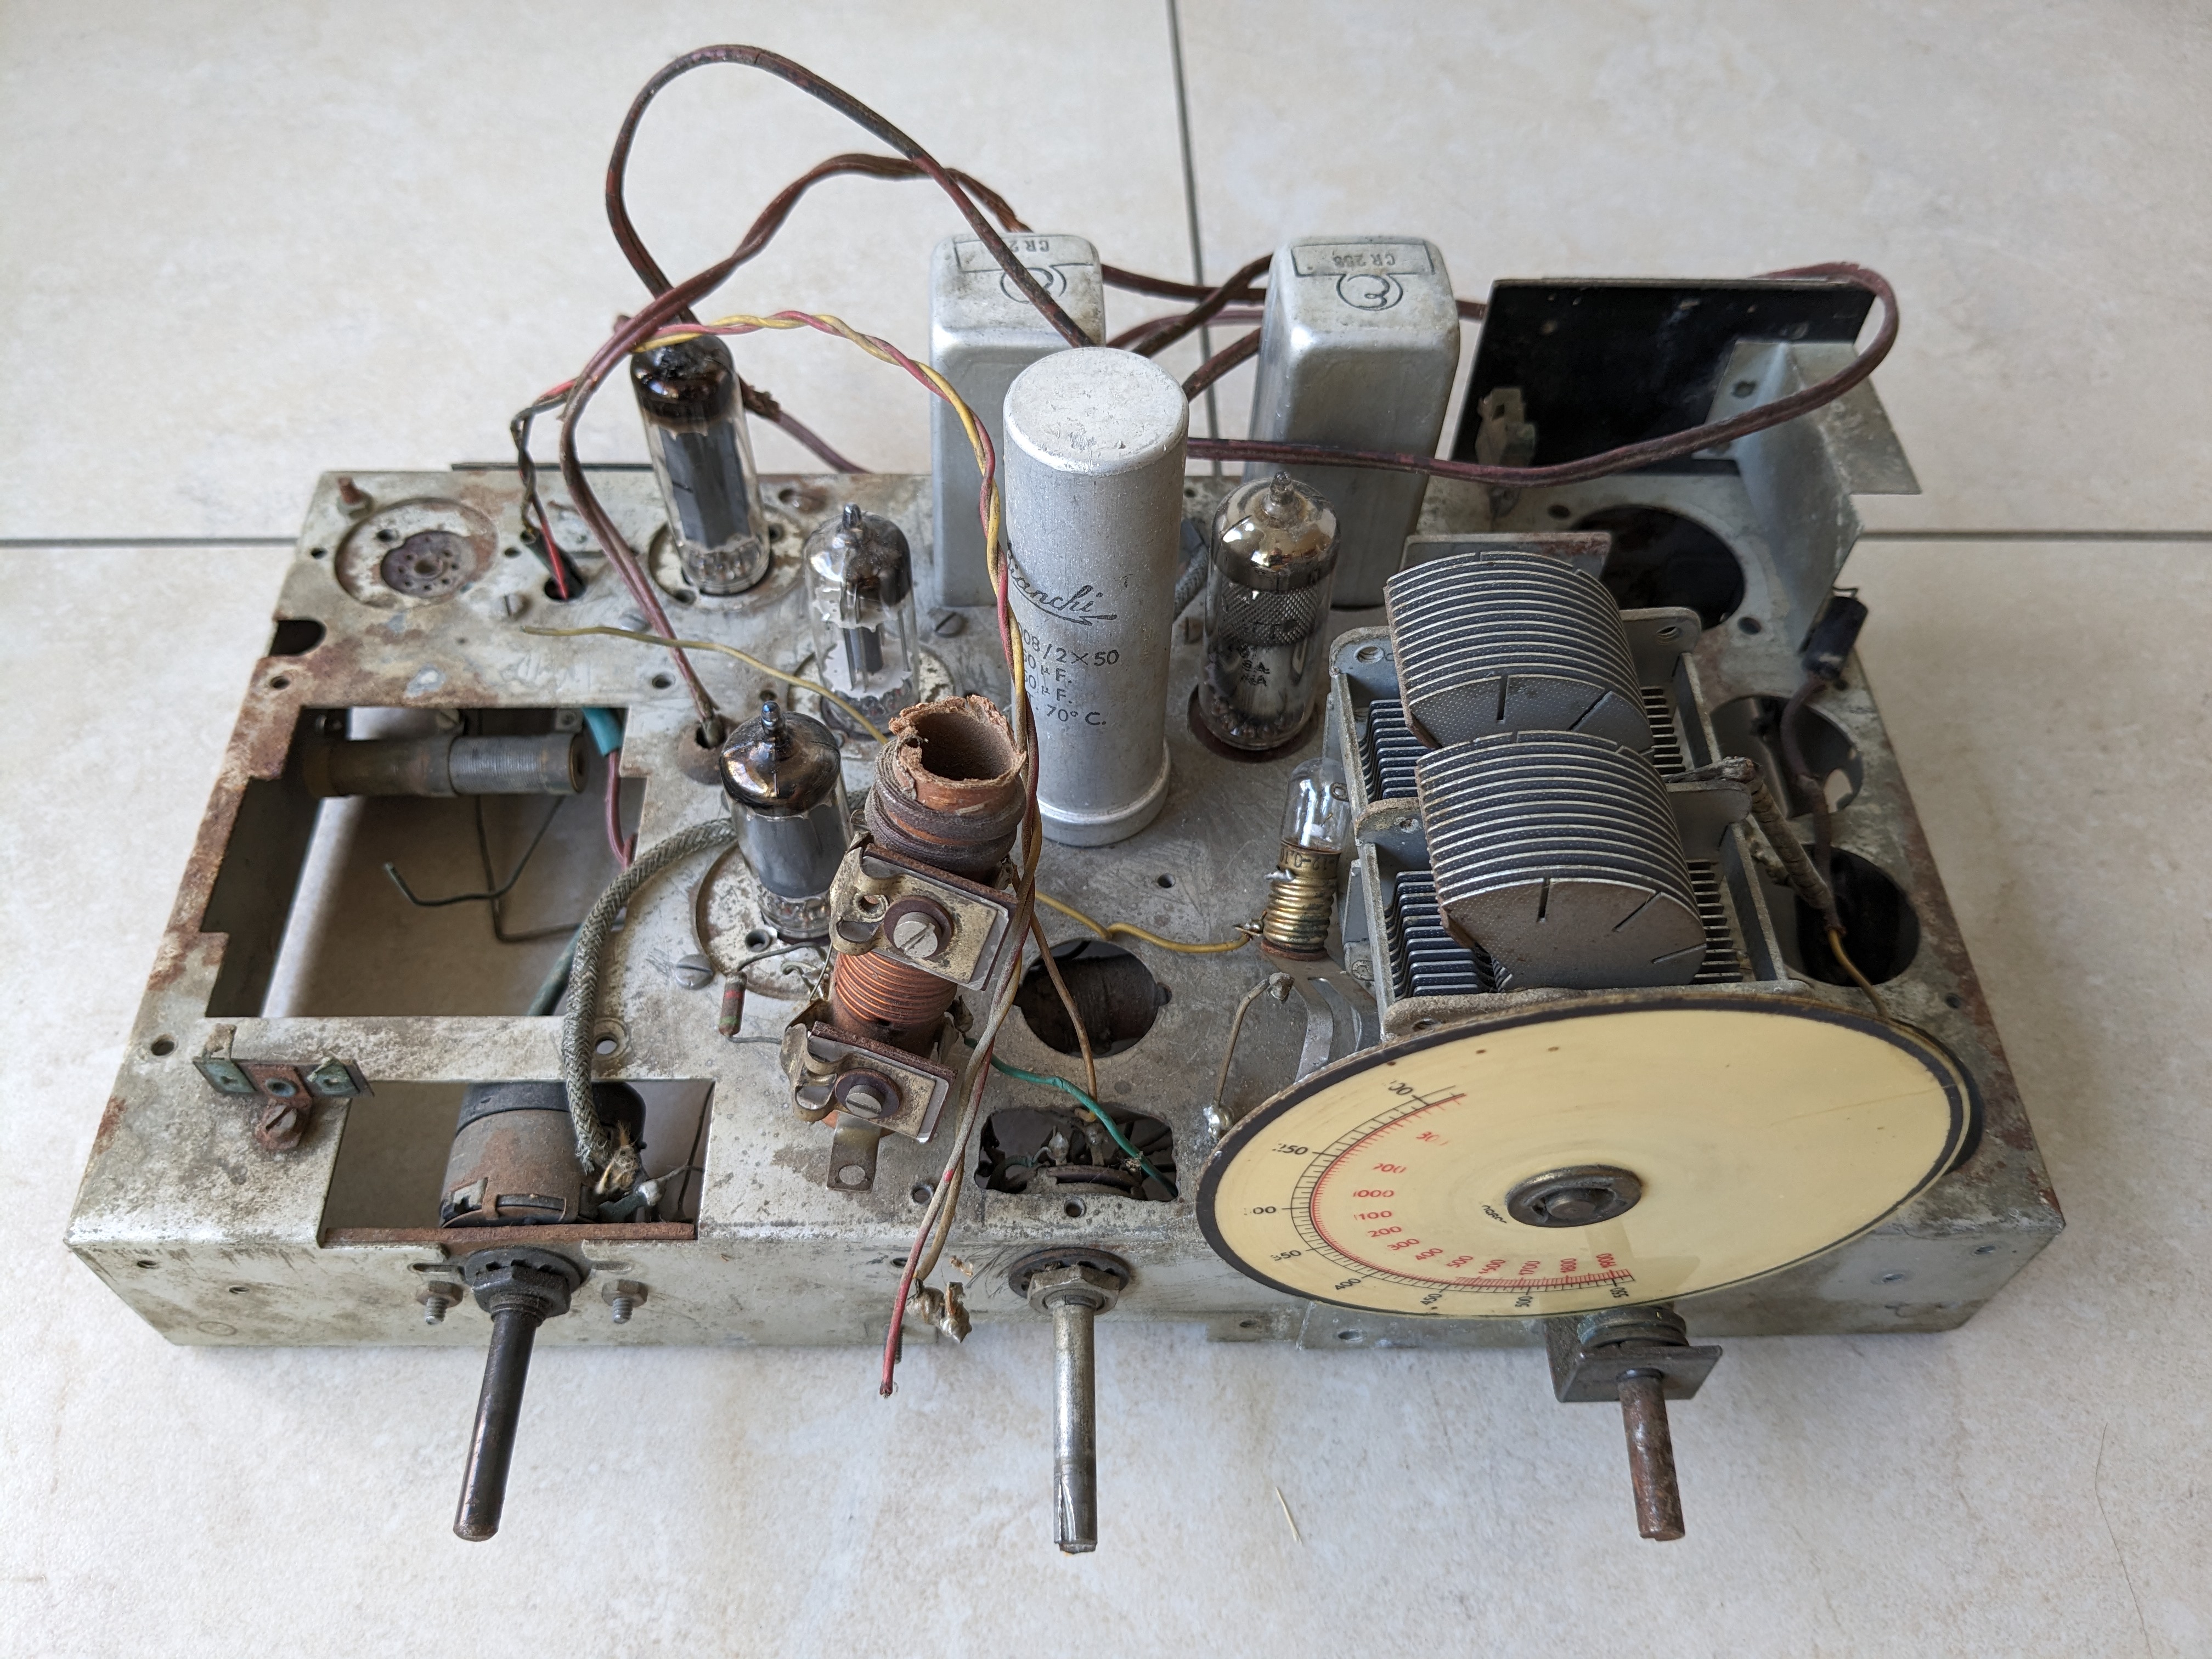
This is how our radio looked inside:

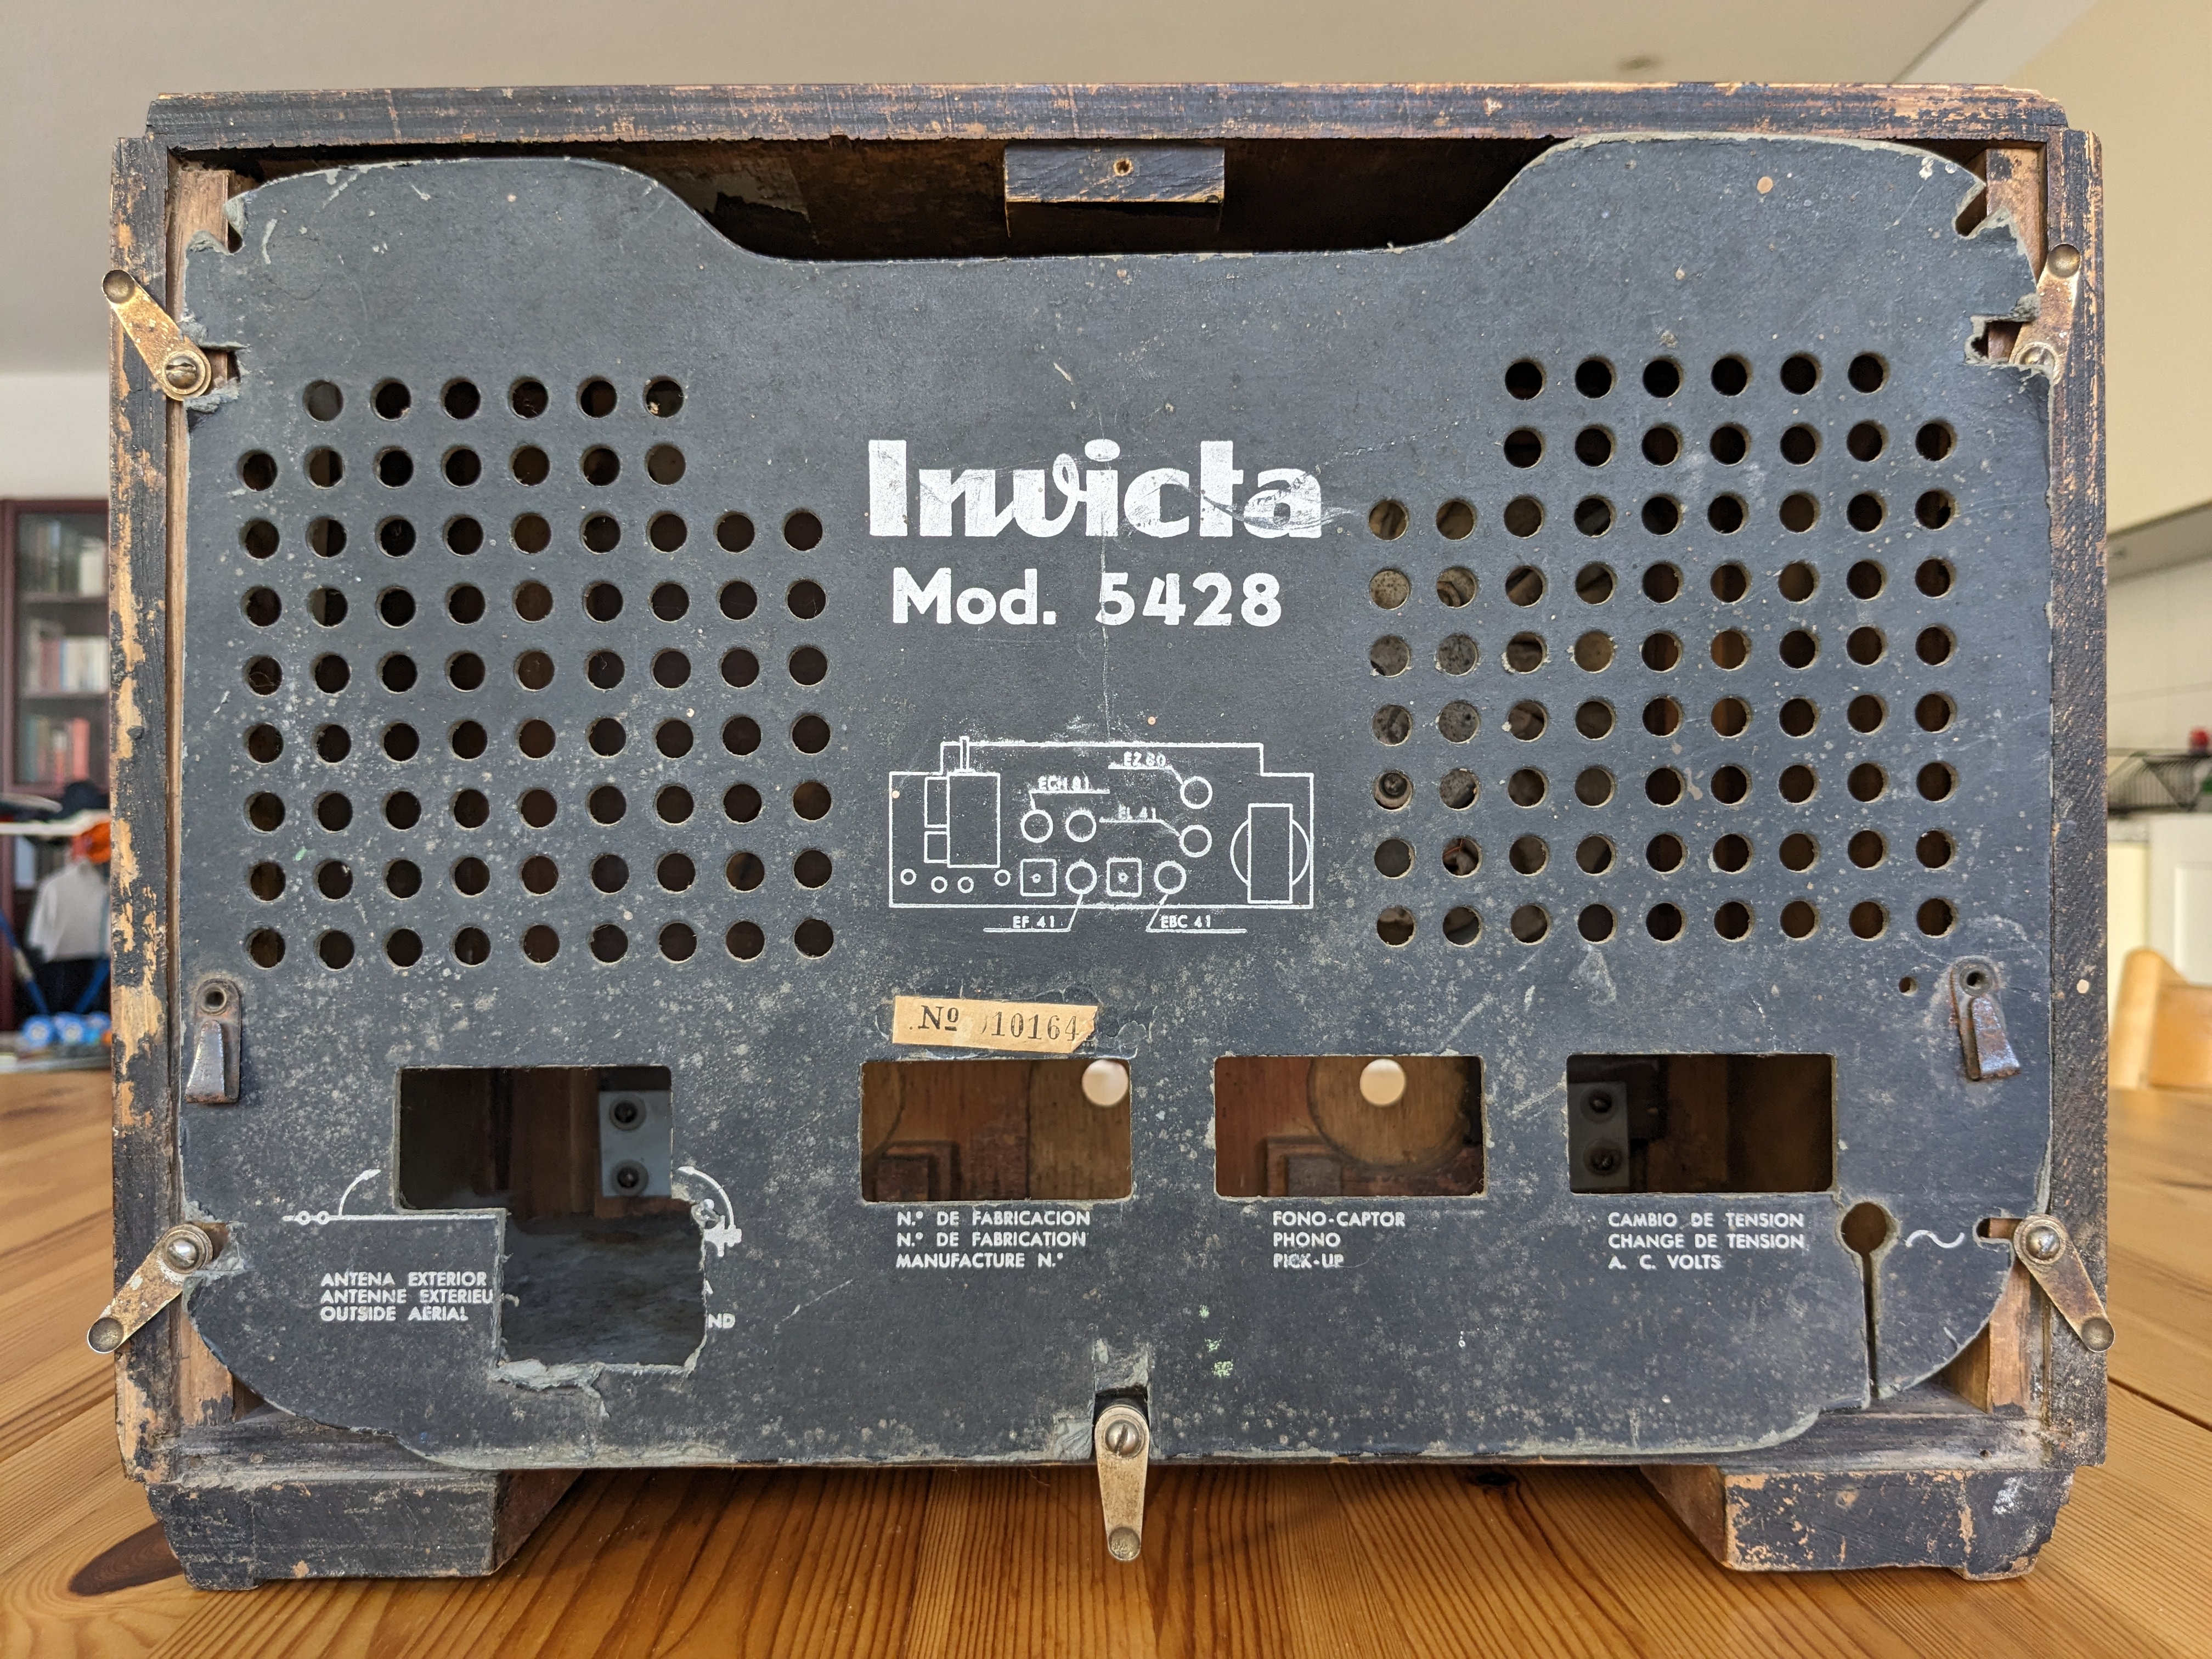
Comparing the inside of the appliance in front of me to the photograph online, I realised that some of the original components of the radio had been replaced with newer parts. That happened approximately twenty years later, in the fifties.
After the exhilarating investigation, it was time to put the radio aside and build the “inside radio” with an old Raspberry Pi 3B and an HiFi Berry amplifier.
I went through this exercise twice, trying two different approaches:
-
A first proof of concept where I used the Music Player Daemon running on ArchLinux on the Raspi 3B, as described in my previous post.
-
The definitive version, described in this blog: a Lyrion Music Server and Squeezlite on Raspbian.
Some background to this decision: since 2007 I have been an enthusiastic owner of several Squeezeboxes. I think cloud is convenient for many use cases, however I like to keep my personal stuff local to my network, and music is no exception. I’m one of these weird persons who still buys CDs, at the same time I like listening to Internet Radio.
A Squeezebox is a family of network music players, to play MP3 music files from a media server and to stream internet radio, launched at the beginning of the 2000’s. The company Slim Devices was acquired by Logitech in 2006. The squeezeboxes where discontinued in 2012.
First things first: find a SD Card - I chose a 32 GB one thinking about copying some of my music collection in a local folder later - and install and prepare the operating system.
Download RaspiOS Lite and unpack:
wget https://downloads.raspberrypi.com/raspios_lite_armhf/images/raspios_lite_armhf-2024-11-19/2024-11-19-raspios-bookworm-armhf-lite.img.xz
tar xf 2024-11-19-raspios-bookworm-armhf-lite.img.xz
Copy to the sdcard device (in my case it was sdb), unmounting first:
sudo umount /dev/sdb*
sudo dd if=2024-11-19-raspios-bookworm-armhf-lite.img of=/dev/sdb bs=4M
sudo sync
Insert the sdcard in the raspi, connect an external monitor via HDMI and an external keyboard via USB.
NOTE: just creating a ssh file on the root partition does not work anymore with newer versions of raspios lite.
Once the prompt greets us, update, upgrade and run raspi-config to set up the wifi and change the hosthame:
sudo apt-get update
sudo apt-get upgrade
sudo raspi-config
The software of the squezebox server was always open source, the community took over the maintenance and kept if for years even after Logitech discontinued the devices. A new community project arised in the early 2020’s to continue the maintenance of the software.
The Lyrion music server (formerly Logitech Media Server) is open-source server software which controls a wide range of Squeezebox audio players. Lyrion can stream your local music collection, internet radio stations, and content from many streaming services.
I wanted this radio to act as a squeezebox server and as a client at the same time, thus having the advantage of connecting my existing squeezeboxes to this new server. For example, in the summer I have an old UE Radio playing on the balcony, and with this solution I should be able to synchronize it with the vintage radio playing music in the kitchen. Nice, right?
NOTE: for years, the squeezeboxes were able to connect to squeezebox.com, a streaming service which allowed to play internet radio without having an own server (and without an account). This service was discontinued at the beginning of 2024.
Start installing dependencies:
sudo apt-get update
sudo apt-get upgrade
sudo apt-get install libio-socket-ssl-perl libcrypt-openssl-rsa-perl
Download and install Lyrion music server:
wget https://downloads.lms-community.org/LyrionMusicServer_v9.0.0/lyrionmusicserver_9.0.0_arm.deb
sudo dpkg -i lyrionmusicserver_9.0.0_arm.deb
The Lyrion music server runs as a service. Check that it’s running:
sudo systemctl list-units --type=service | grep lyrion
sudo systemctl status lyrionmusicserver.service
Access the Lyrion server via browser, default port is 9000:
With the server up und running, let’s move to the installation of the client.
Squeezelite is a software client for the Lyrion Music Server.
Install squeezelite:
sudo apt-get install squeezelite
Check that it has been installed properly:
squeezelite -h
Same as the Lyrion server, squeezelite runs as a service:
sudo systemctl status squeezelite
Now we have our server and our client running on the same raspberry pi. What comes next is the sound configuration.
I wanted my internet radio to have a decent quality audio playback, with analog sound and passive speakers. I learnt that for this a digital/analog converter and an amplifier are needed.
HiFiBerry sound boards work in combination with the Raspberry Pi platform, provide high-quality sound boards, are affordable and easy to mount.
In my last post, I describe how I created my first radio prototype with the MiniAmp and the Raspberry Pi 3. I decided to keep the same hardware combination in this project.
The HiFi Berry MiniAmp is the smallest amplifier of the HiFiBerry family. While its Class-D amplifier provides only 3 Watts of power, this is often enough for small music player like kitchen radios. The board will be powered by the Raspberry Pi power supply, so an additional power supply is not necessary. See the photograph of the MiniAmp on my previous post.
To configure the hifiberry soundcard, I mainly followed the instructions on the website.
Modify the configuration file as described:
vi /boot/firmware/config.txt
NOTE: the documentation refers to the file /boot/config.txt which in newer system is actually replaced by /boot/firmware/config.txt
Remove the line:
dtparam=audio=on
Make sure audio is disabled on the vc4-fkms-v3d overlay:
dtoverlay=vc4-kms-v3d,noaudio
Load the correct device tree:
dtoverlay=hifiberry-dac
After the changes, reboot. The command aplay -l will show the hifiberry sound card:
**** List of PLAYBACK Hardware Devices ****
card 0: sndrpihifiberry [snd_rpi_hifiberry_dac], device 0: HifiBerry DAC HiFi pcm5102a-hifi-0 [HifiBerry DAC HiFi pcm5102a-hifi-0]
  Subdevices: 0/1
  Subdevice #0: subdevice #0
NOTE: in case another squeezebox server is running on the same network, as it was the case during my experiments, the squeezelite might connect to the wrong server. To avoid this, it might be handy to modify the squeezelite service to always connect to the server in localhost. For this, it should be enough to include in /etc/default/squeezelite a parameter SL_OPTS pointing to the right IP address. Alternatively, a workaround is to make sure the other squeezebox server is not running when booting the raspberry pi.
A key requirement of this project was to keep the original controls, even if their functionality had to differ from the original.
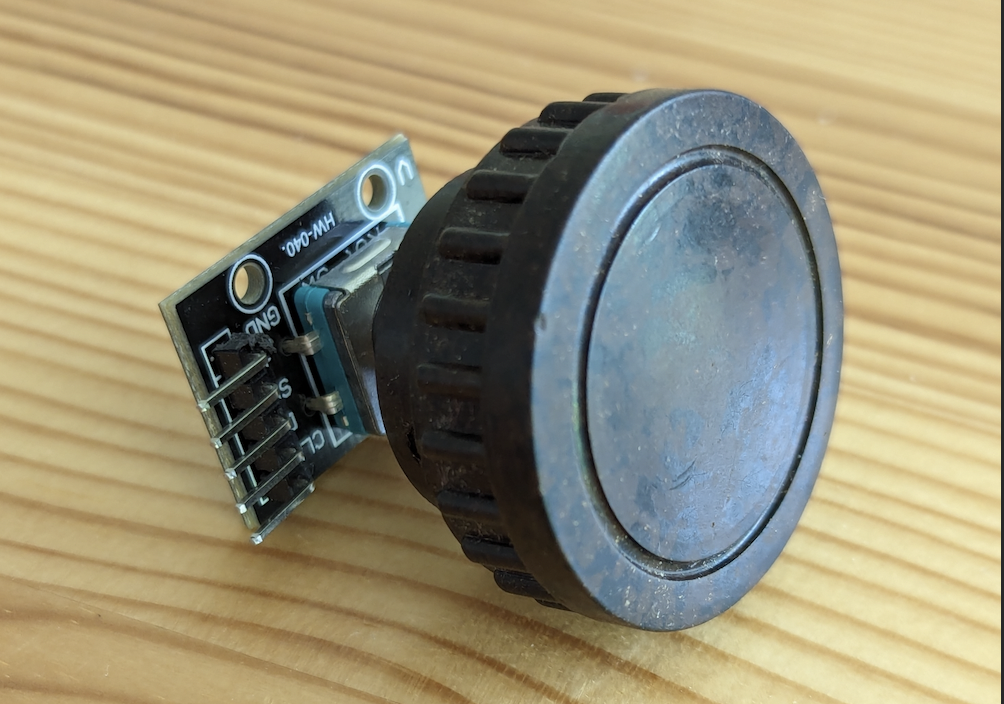
For translating the mechanical movement of a wheel or button into electrical signals, you can use a potenciometer or a rotary encoder. Researching for this little project, I learnt that the main difference between them is that the potentiometer outputs analog signals whereas the rotary encoder outputs digital signals.
The raspberry pi has a GPIO interface, so it is possible to directly connect the digital output of the rotary encoder to the gpio pins on the raspi. A python library can be used to translate this signals into actions.
If we used potentiometers, translating the analog output to digital output would be necessary first, putting an Arduino, a Raspberry Pi Micro or another device in between. I decided to avoid including more additional hardware and go for the rotary encoder approach.
There are following controls available in the radio, which should be adapted as follows:
- On the left, a wheel, which probably was the volume control: this one should keep the same function when rotating. Additionally, it should do pause/playback when pressed.
- An on/off button in the middle: the original switch with two positions must be re-invented to host a stateless on/off push button.
- A tuner, which is a mechanical component turning the wheel where the bands are written. The tuner had to stay and move the dial like it did originally - just because it looks nice - there won’t be any control attached to it anymore.
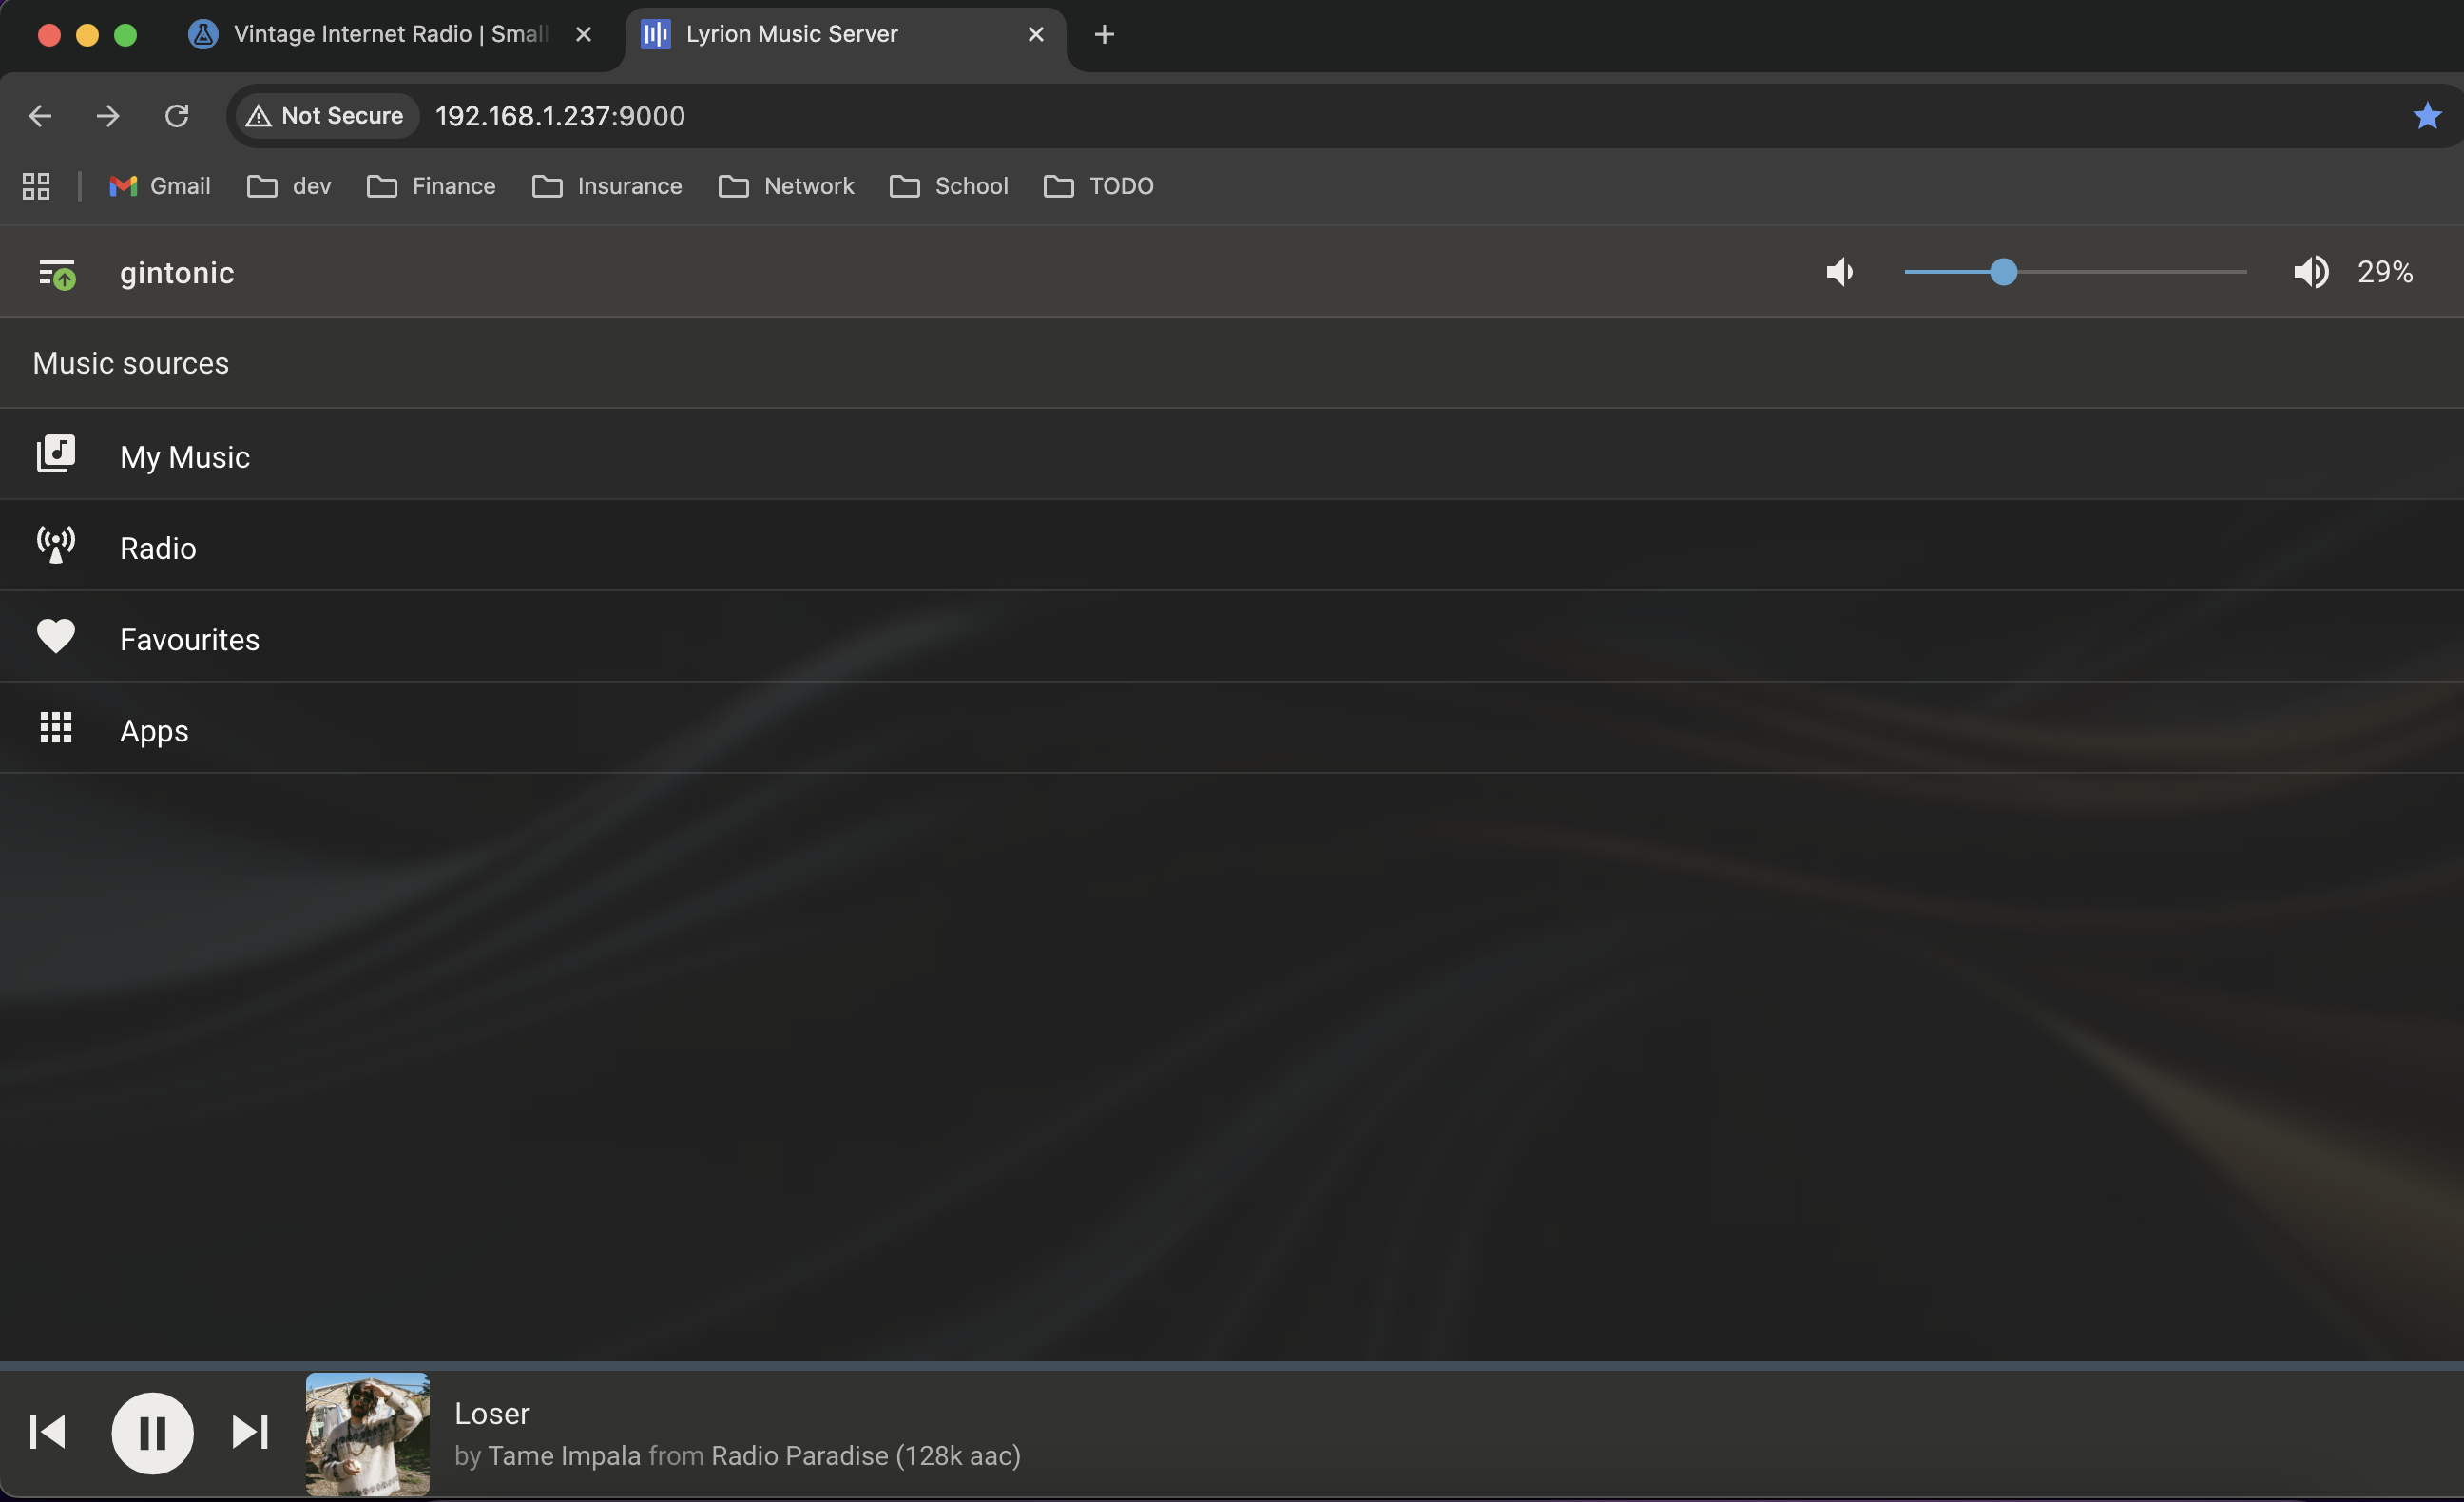
And you might think, wouldn’t be nice to change stations or play local music? It would, and it is indeed possible, since the Lyrion server has a nice responsive web interface, so the radio can be controlled via web from the laptop or from the mobile phone. Here a glimpse at the Material web interface of the Lyrion on mobile:
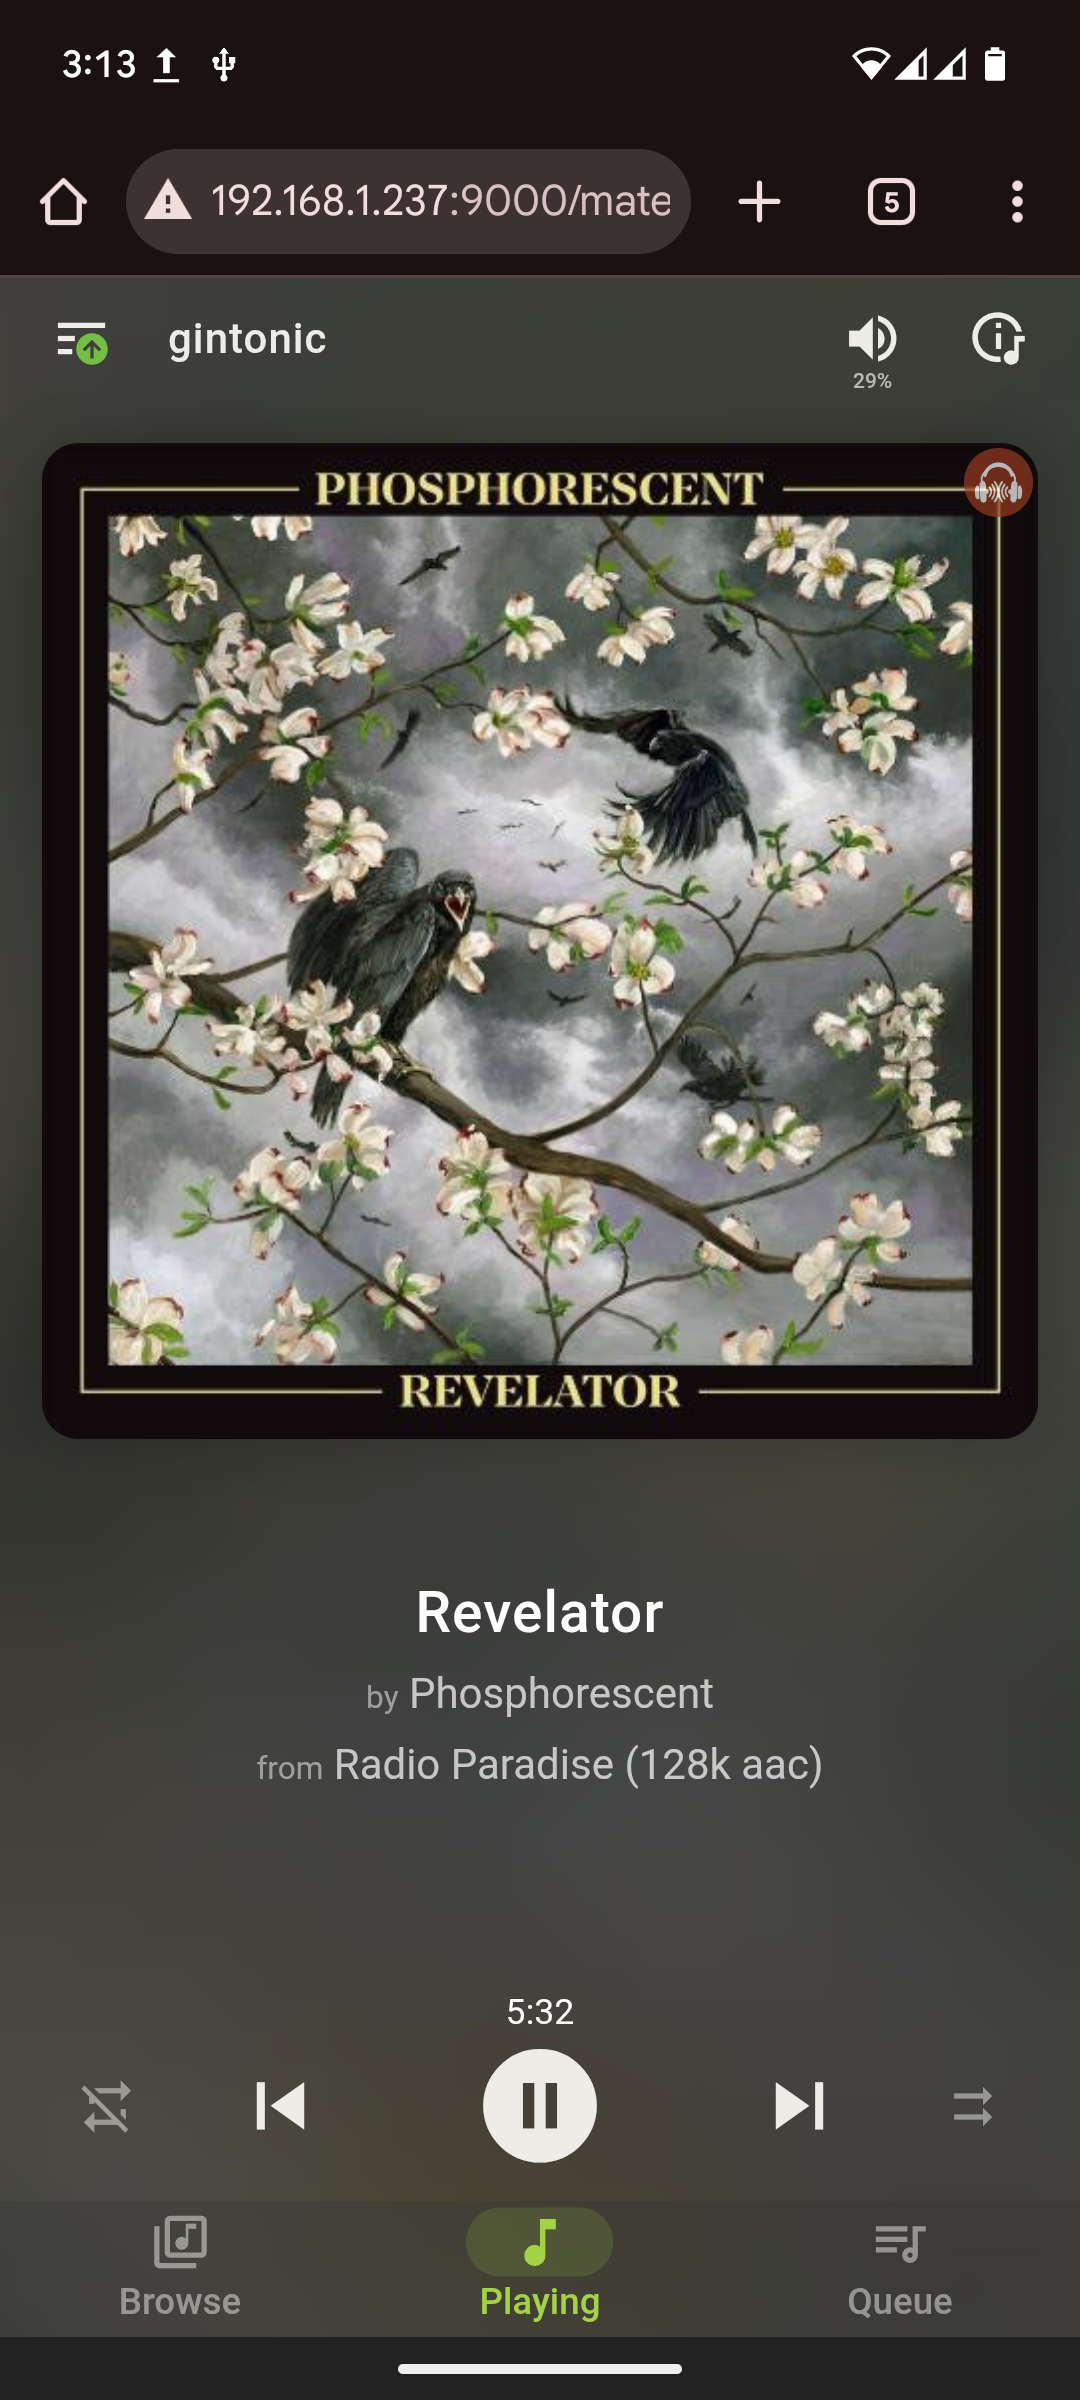
The physical controls are designed to manage the main functions directly - I don’t need to reach out for my mobile to turn up or down the volume - but I still can, if I want to, and all the functionality is available via web interface.
A little lamp in the original radio would iluminate the dial from behind. The interesting part is that, even if the interior of the radio was in a very bad state, the lamp was still intact. When we tried connecting it to a small battery, it lighted, after almost a century. We kept it in the original place, of course disconnected, but yay to the old little lamp.
For safety and energy efficiency reasons, we mounted a led to iluminate the display from behind instead. This led must be turned on when the music starts playing, and turned off when the shutdown button is pressed.
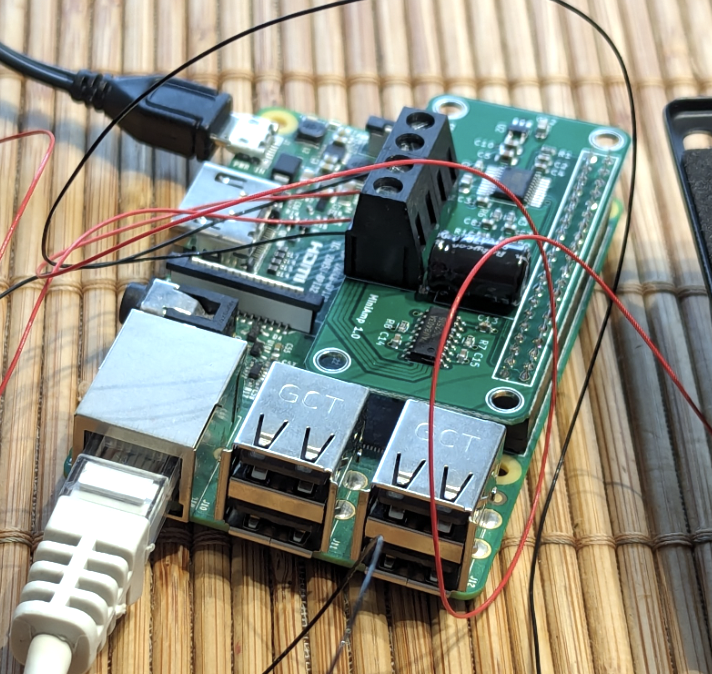
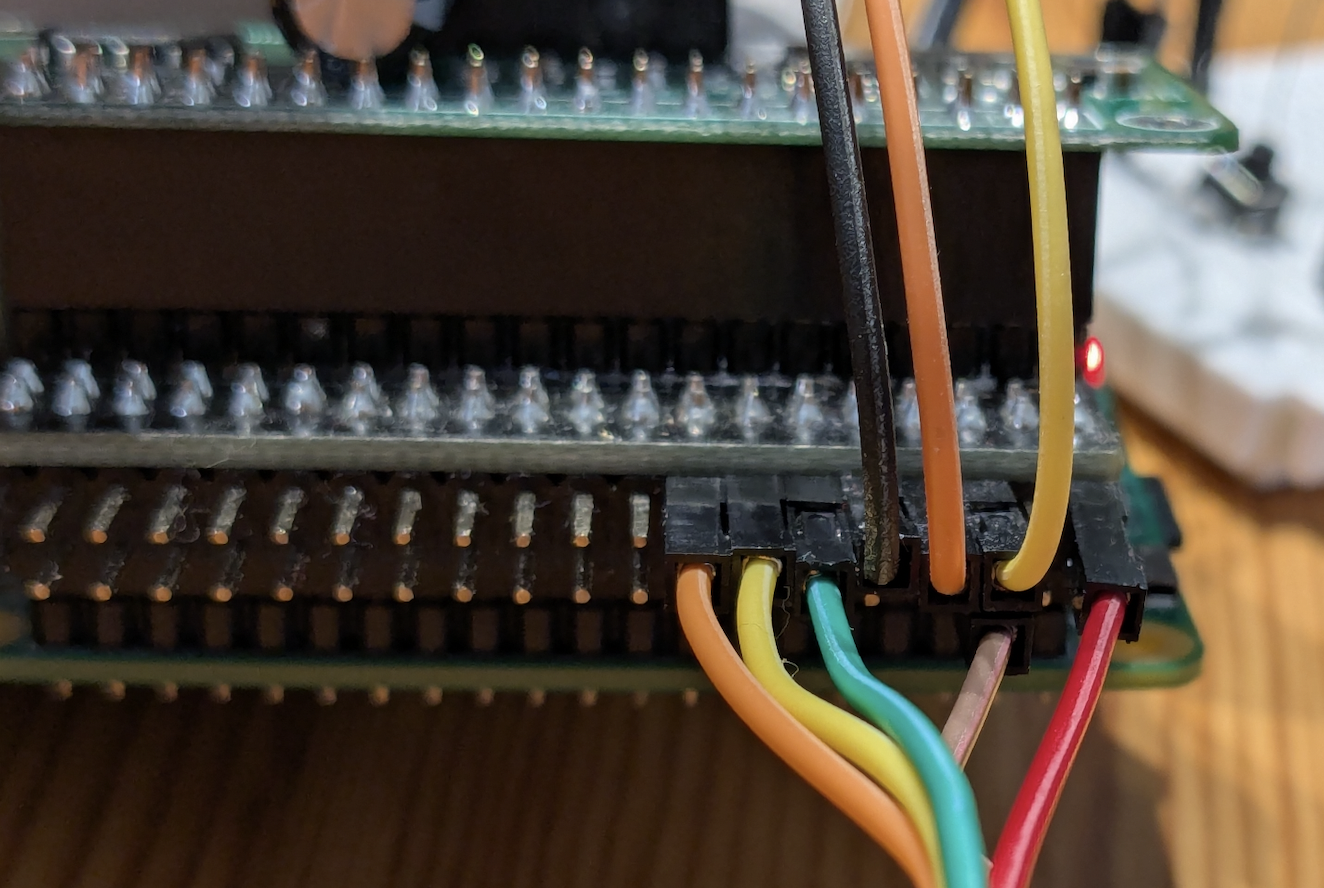
A small challenge arised when examining the gpio pins in the raspberry pi: the totality of the gpio pins were physically connected to the hifiberry sound card, even if only some of them were in use, so I couldn’t bind them to the controls. To solve this I bought an adapter - acting as a multiplexer - which provides two physical connections to each pin.
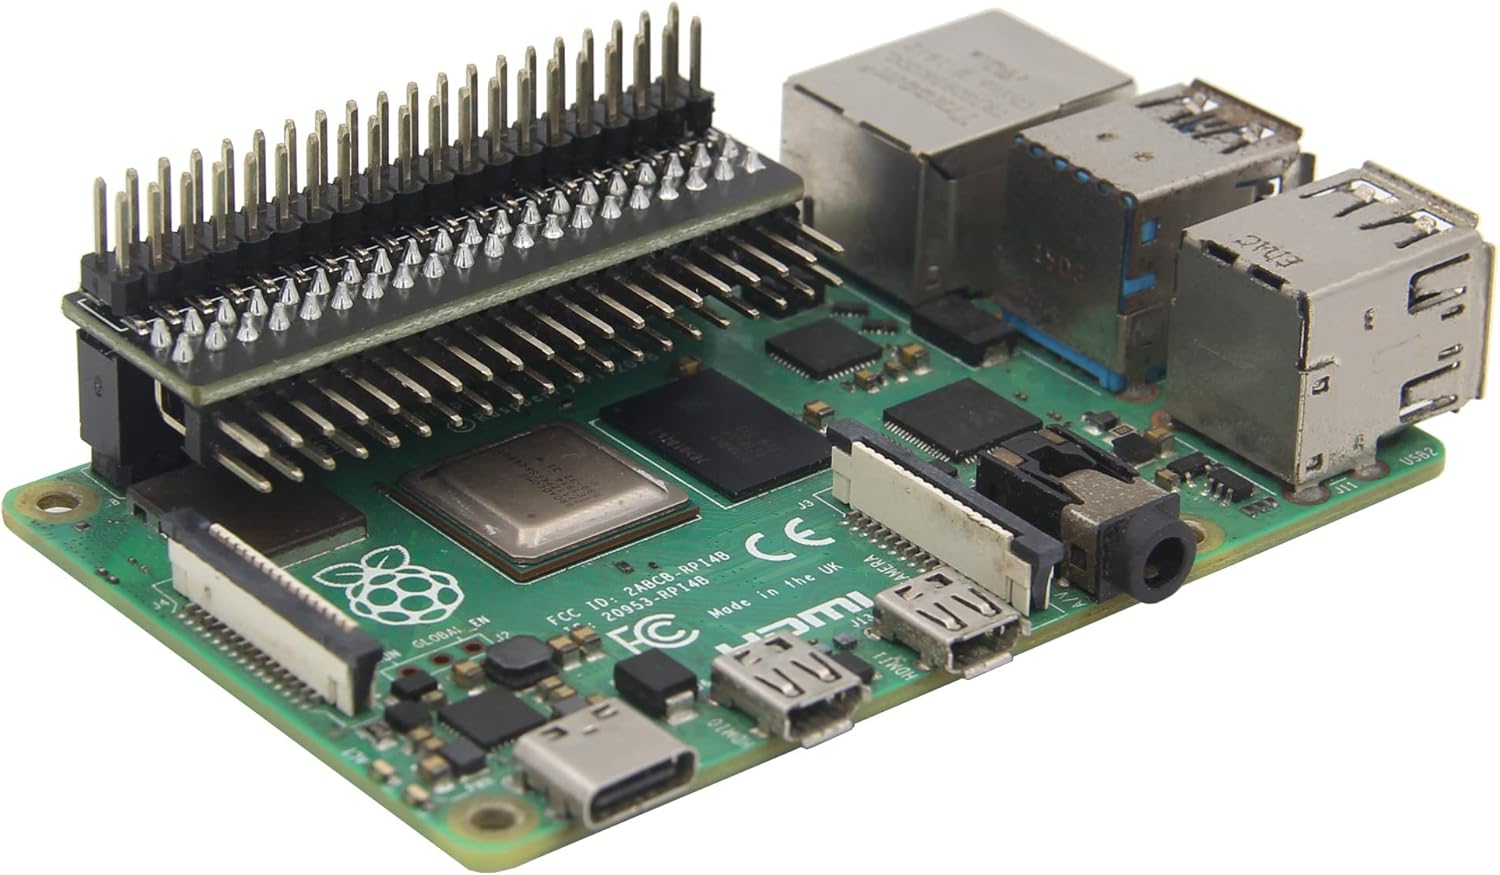
In this way, a side of the adapter would be used integrally used by the hifiberry, but the unused pins could still be connected to the rotary encoder, the push button and the led from the other side.
The lyrion server side exposes a JSON-RPC 1.0 API over HTTP on port 9000: sending commands is straightforward.
To handle signals emited by the physical controls programatically, I wrote a small Python script. I tried the library RPi.GPIO first. Essentially it worked, but I had some issues with timeouts: after a couple of minutes the connection to the gpio controller would be lost and the controls didn’t work anymore. I moved then to gpiozero - a wrapper around RPi.GPIO - which allows handling signals coming from the physical buttons via interrupts, solving the timeout issue.
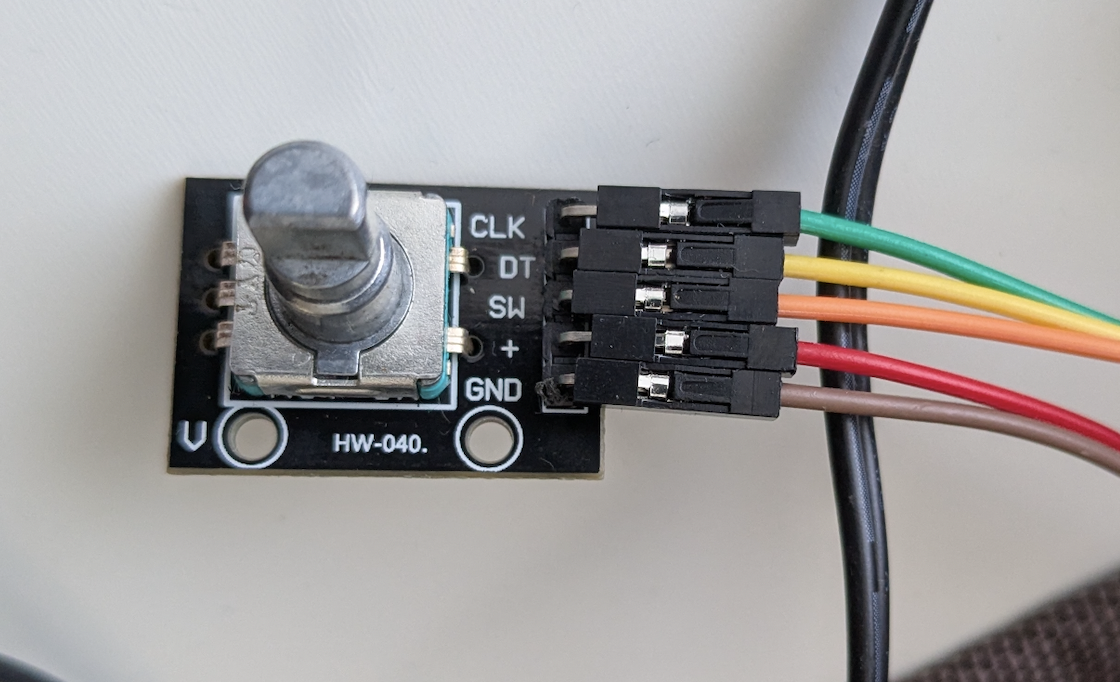
The mapping between the physical pins on the raspi, logical pins, rotary encoder pins and led pin is like follows:
Pin 11 (GPIO 17) o-----| CLK
Pin 13 (GPIO 27) o-----| DT
Pin 15 (GPIO 22) o-----| SW
Pin 7  (GPIO 04) o-----| LED
Pin 9  (GND)     o-----| GND
The code of the python script is available in my github repository
In a nutshell, what radio.py does is:
- It starts playing my favourite internet radio channel: Radio Paradise.
- It turns on the led behind the dial.
- Defines interrupts for the rotary encoder: push, turn the wheel clockwise, turn the wheel anti-clockwise.
- Turning the wheel clockwise will send a command to the lyrion server to increase the volume.
- Turhing the wheel anti-clockwise will send a command to the lyrion server decrease the volume.
- Pushing the button will send a command to pause the music, pushing it again will resume the playback.
- Defines an interrupt for the shutdown signal, which will turn off the led and quit the program gracefully before the shutdown process is initiated. How the shutdown signal is emitted, is explained later (“Shutdown button”).
Note: for the script to run, following python libraries must be available in the virtual environment - requests, logging, signal, gpiozero.
In order for the python code to run automatically upon start, it must be configured as a service. For that, first copy the script to an appropiate location, for example /usr/local/bin, then make the file executable:
sudo chmod +x /usr/local/bin/radio.py
Write the radio.service configuration file:
sudo vi /etc/systemd/system/radio.service
The code for the configuration of the service is available here.
Worth mention is the directive ExecStartPre in the configuration, which is set to poll and wait until localhost:9000 is available. Without this directive, if the script is running before the lyrion server is ready, the music will never start playing.
Reload the daemon:
sudo systemctl daemon-reload
sudo systemctl enable radio.service
Once enabled, the daemon should start automatically when the raspberry pi is booted.
The shutdown button must be controlled by a physical button with no state:
- If the radio is on, pushing the button will initiate a graceful shutdown of the raspi. The service gets the terminate signal and the light goes off immediately.
- If the raspi is in standby, pushing the button again will start the boot process. After some seconds, the light turns on and the music starts to play, as soon as my python service starts running.
NOTE: To power down the raspberry pi completely I opted for a pragmatic solution: a switched power socket. This allows cutting the power completely at the end of the day, even if in standby, the raspberry consumes almost no power.
For mapping the on/off functionality, we had to re-use the mechanical switch in the middle, originally thought to change the frequency band - which has two positions. This conflicts with the expected use for the control, since our on/off button should be stateless.
The best idea I could think of was to go for an additional rotary encoder. It was a better mechanical fit than a push button, since rotary encoders could be screwed to the original controls, as we did for the volume wheel. The other advantage is the mechanical feedback you feel when you press. The only downside is that we actually don’t need the rotation functionality. The original switch is therefore not switching between two positions anymore, it just turns indefinitely, but it allows to be pressed, and you can still put in either of the two original positions, looking genuine.
Let’s go back to the software side of things. The raspberry pi allows to control power on/off with a momentary push button as long as the pi is connected to power supply. To make this possible, modify again the /boot/firmware/config.txt file adding following lines:
# Allow graceful shutdown
dtoverlay=gpio-shutdown
Default pin is number 5 (GPIO 3) if not specified. Only SW and GND must be attached, since we want to ignore the rotation signals:
   Pin 5 (GPIO 3) o-----| SW
   Pin 6 (GND)    o-----| GND
Modify the /etc/systemd/logind.conf file, uncommenting following line:
HandlePowerKey=poweroff
That’s enough for the power on/off button to work, the python code does not need to be changed, since this control works on the OS level.
The speaker needed to be replaced as well: it looked quite damaged, and anyway, it would have needed very high voltage to work.
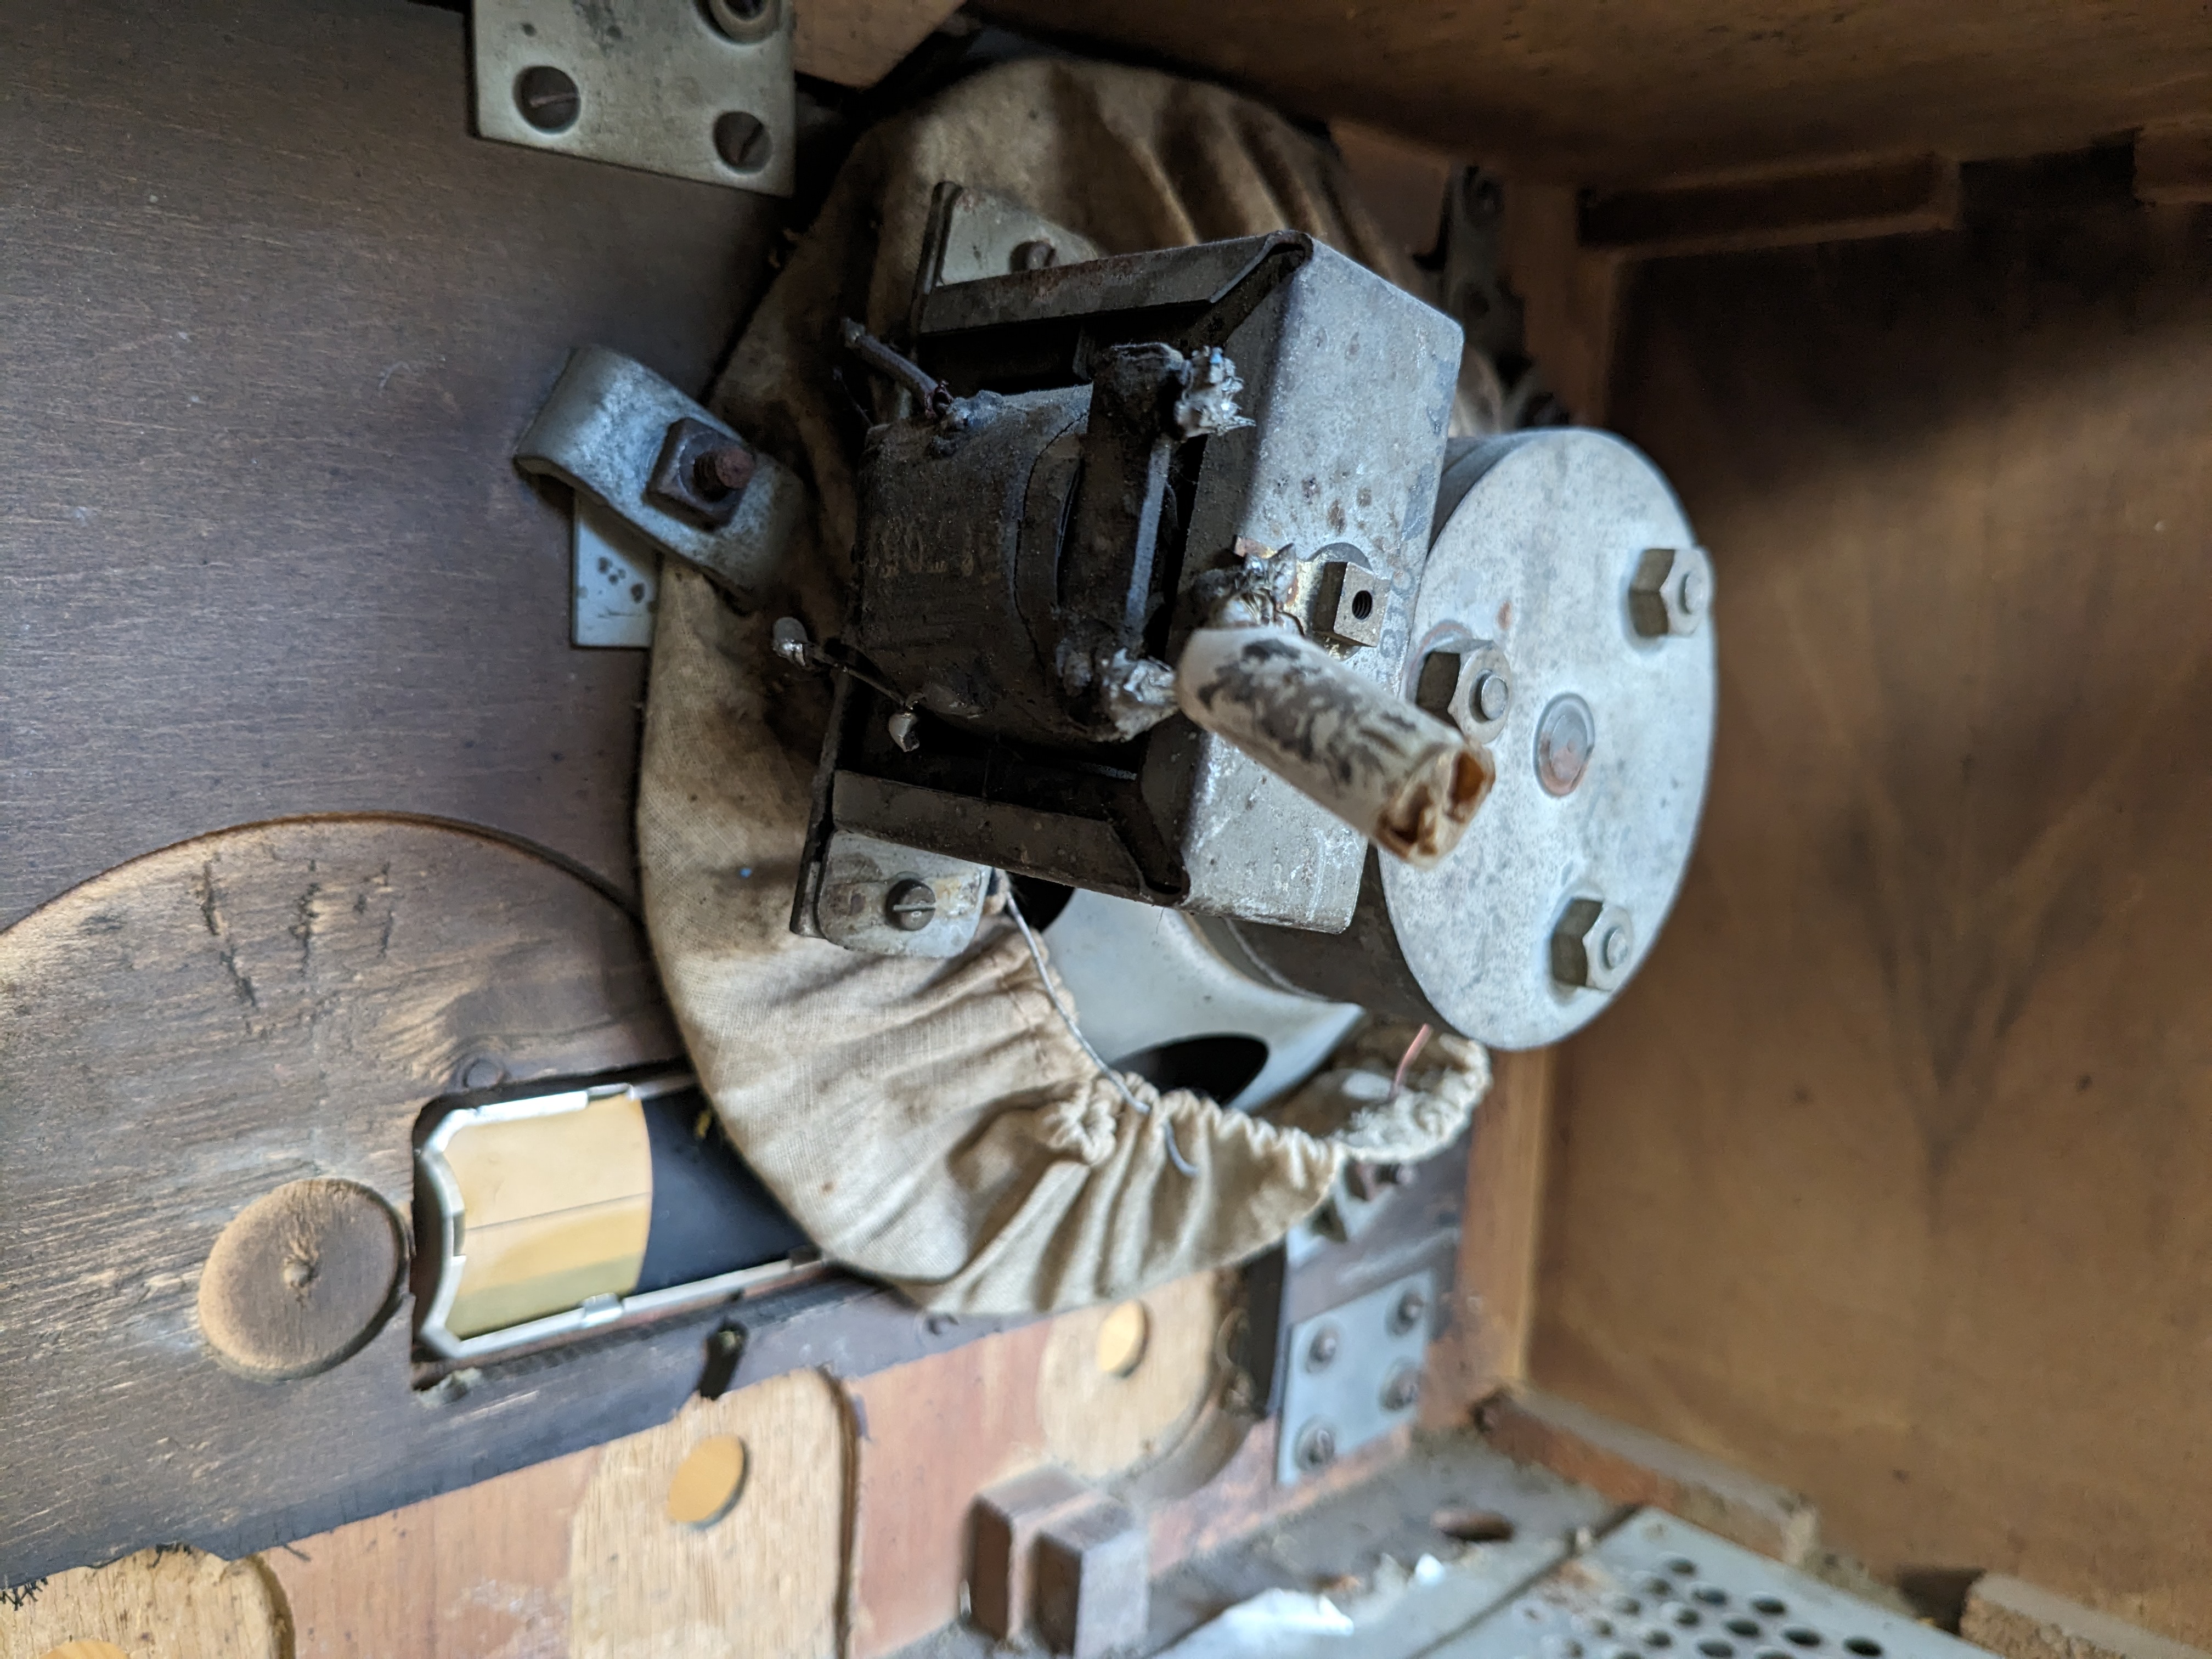
I needed two, small, good-sounding speakers. Following my mantra of always trying to reuse old hardware, I thought of the old home-cinema system I had lying around on the cellar. I disassemmbled two of the satelite speakers of the set, taking away the protective cover. These work wonderfully with the MiniAmp, providing good quality sound.
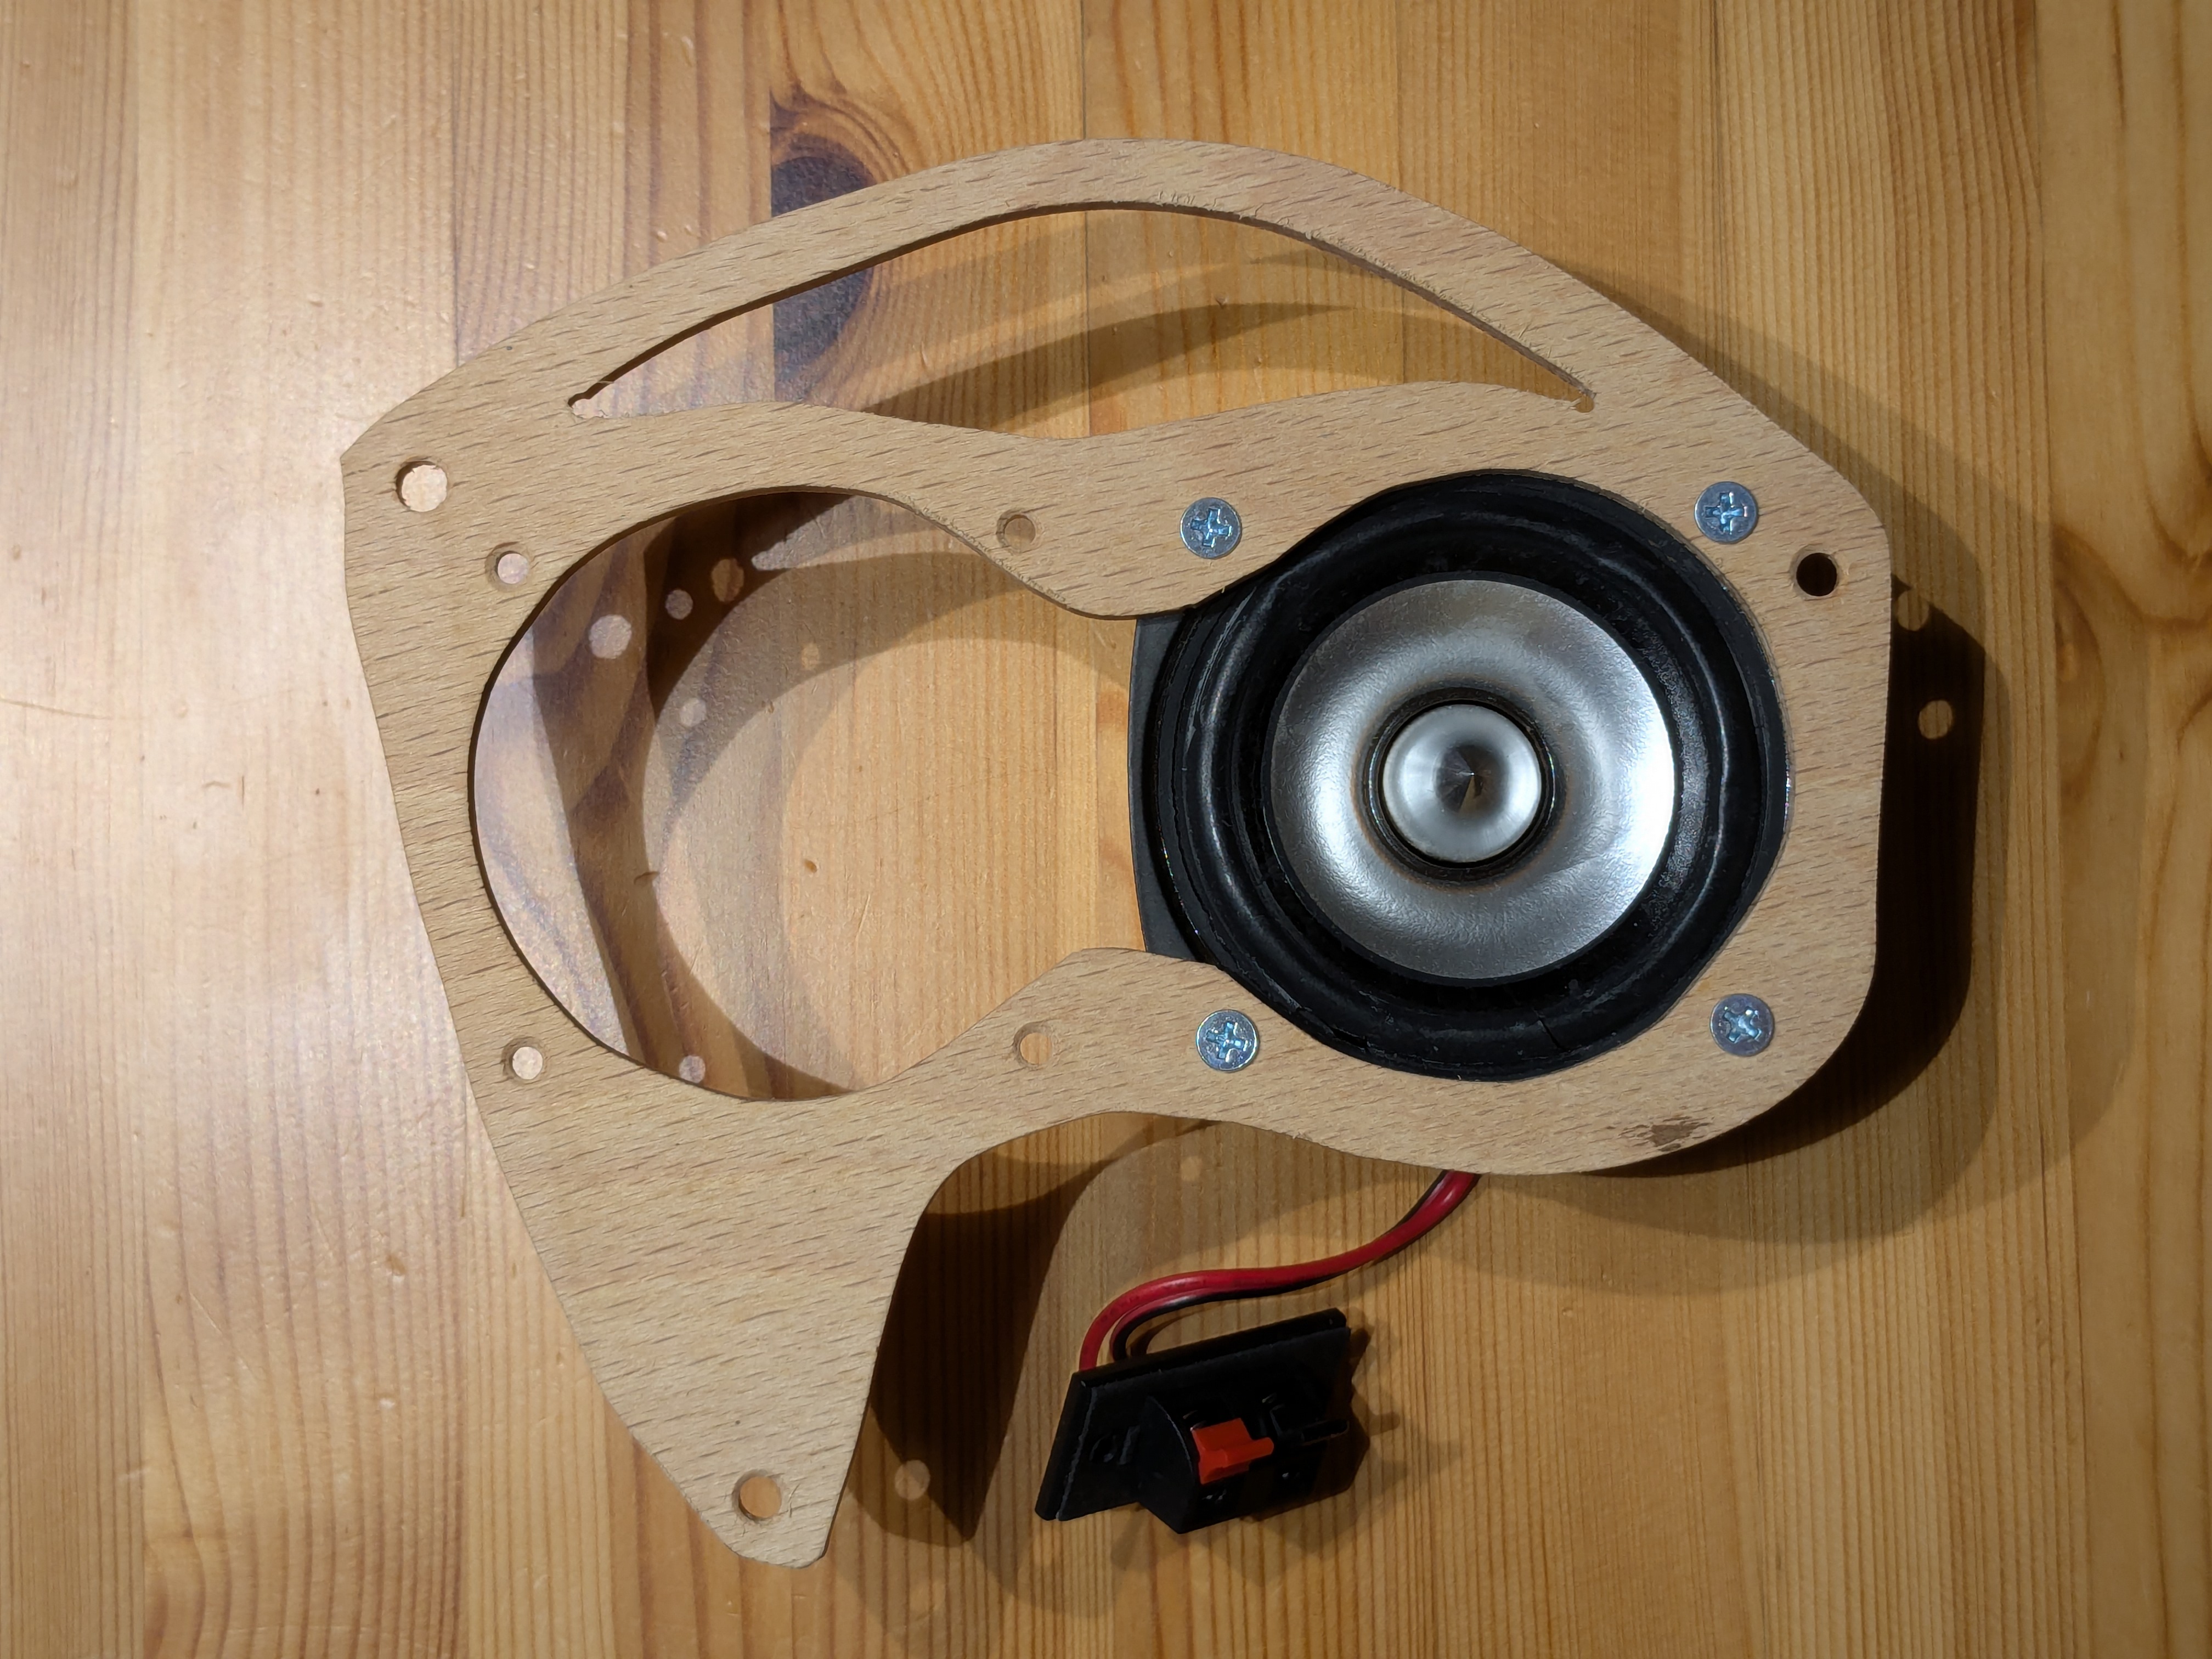
We mounted the speakers with a custom- hand-made piece of wooden fixed to the radio wall:
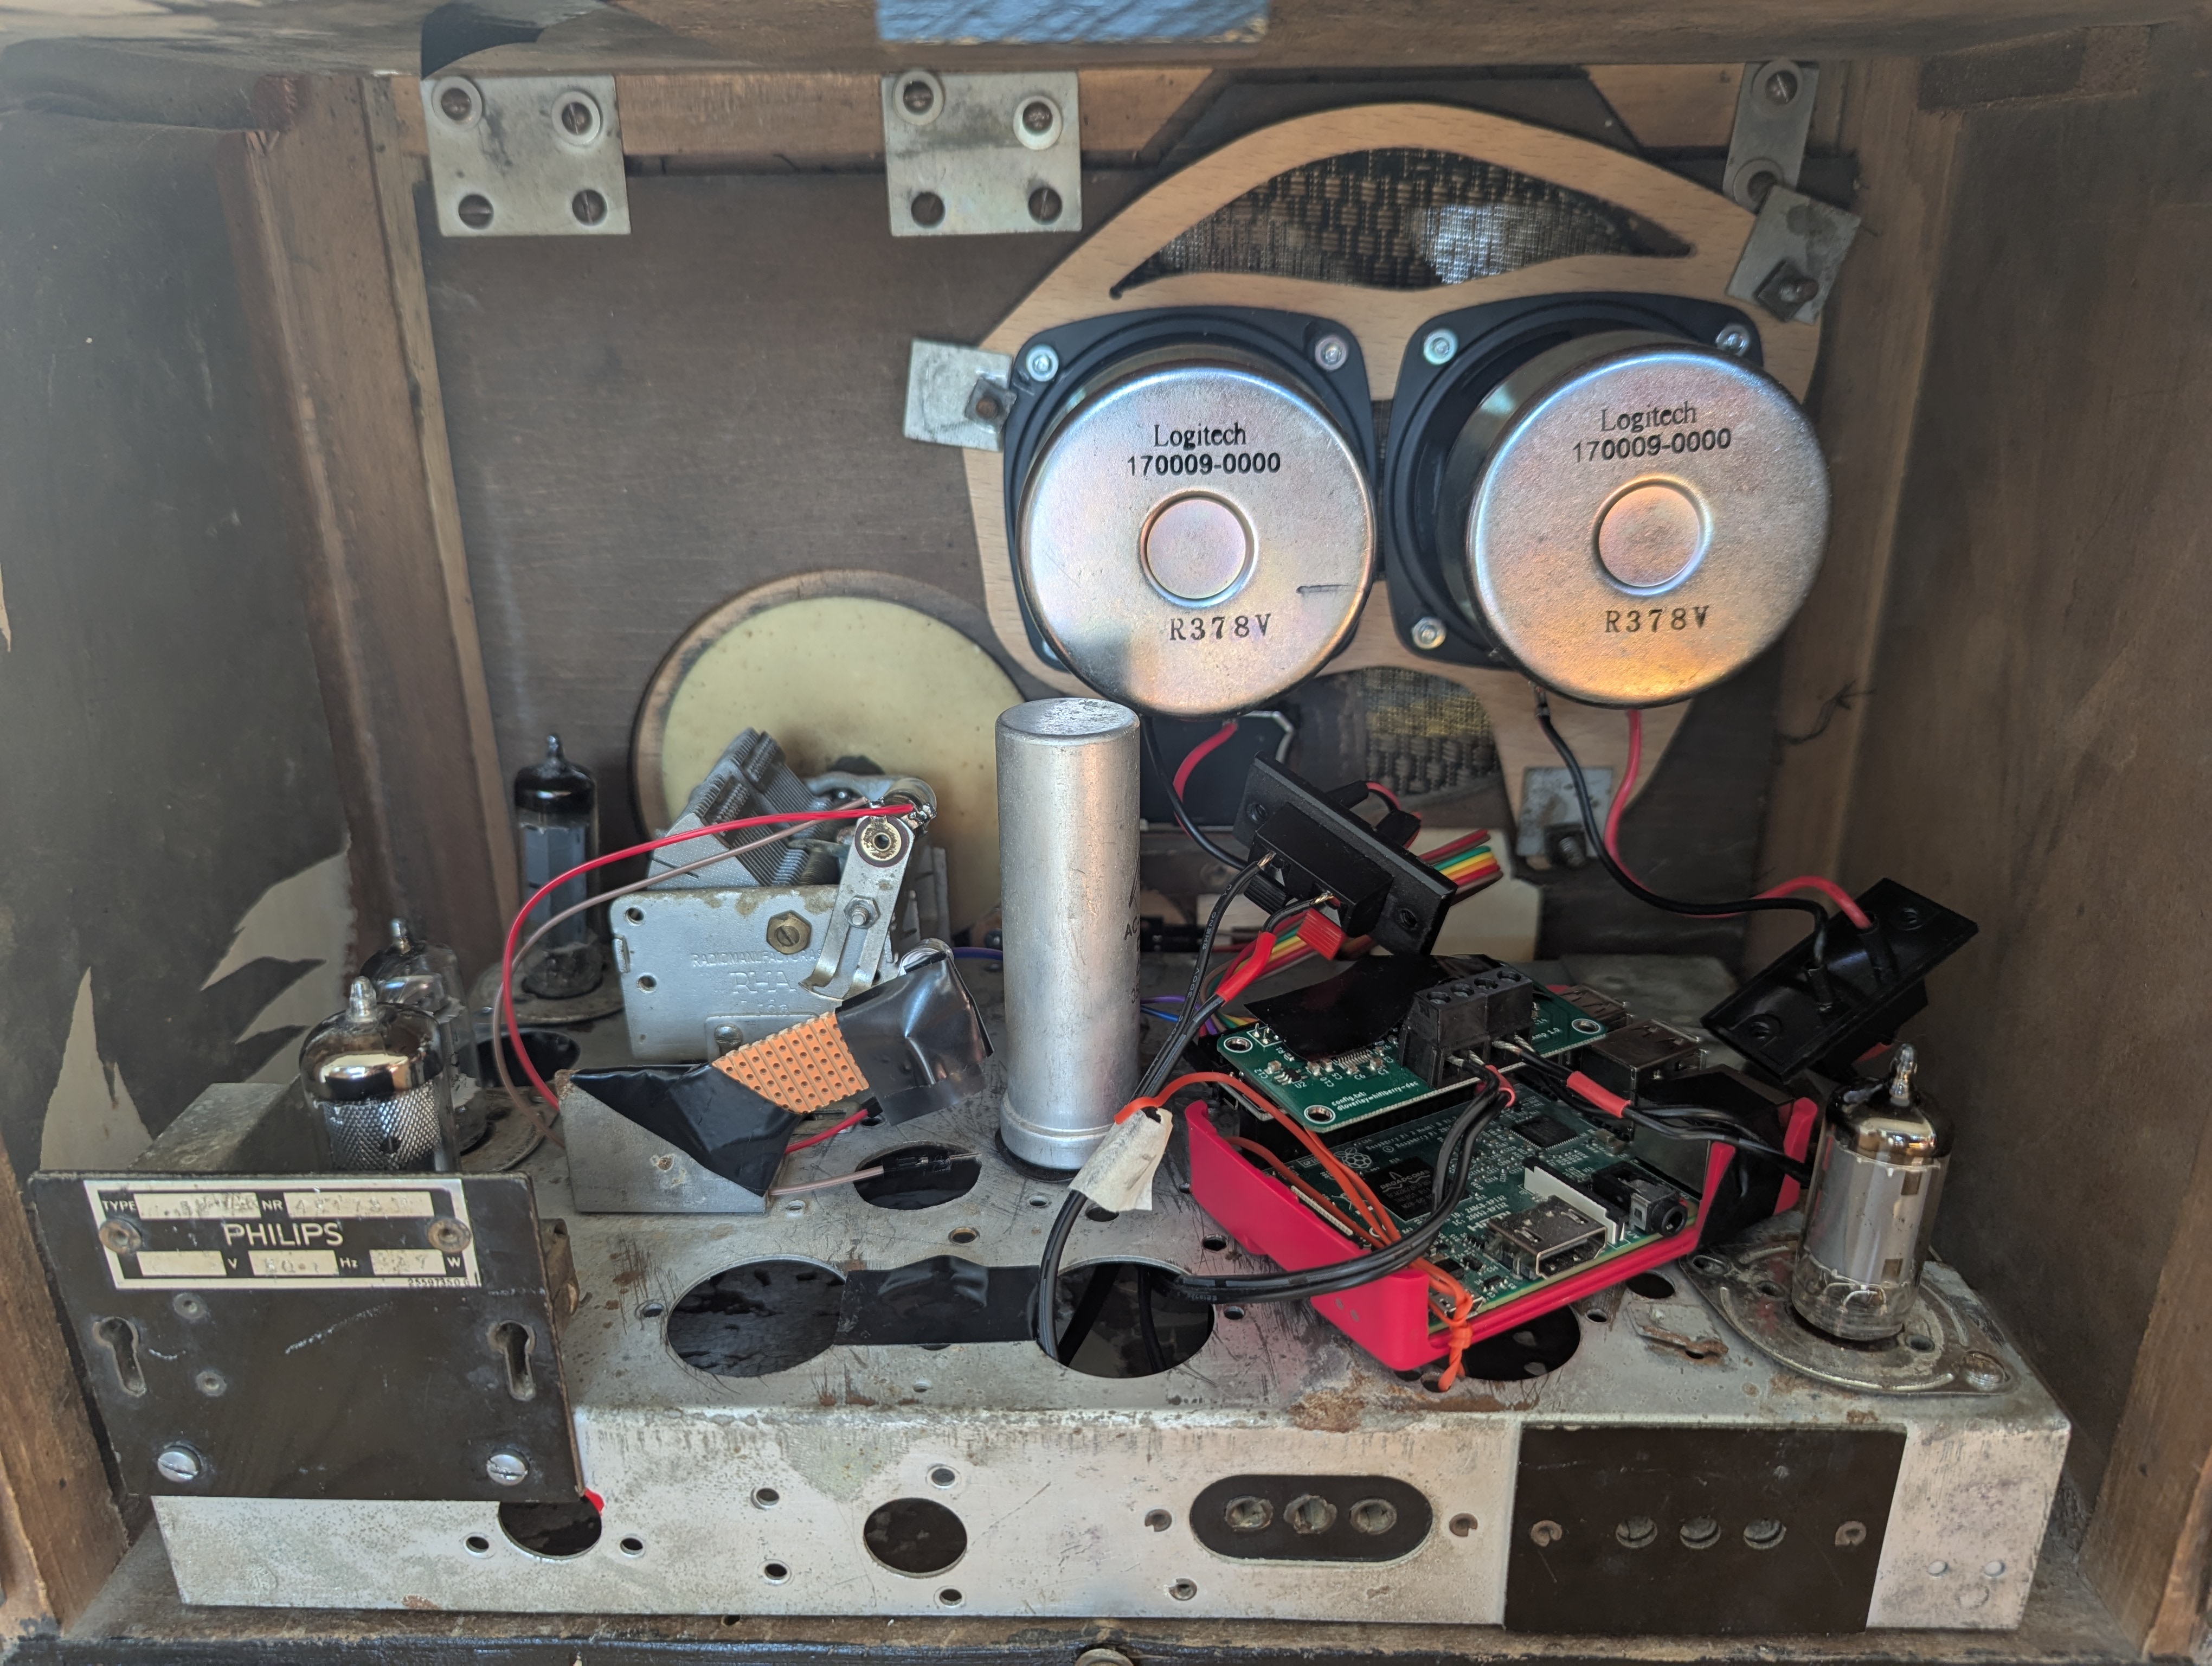
We removed the mess of old cables and burnt resistences. We kept the metal base of the radio and the dial, and repaired the control which turned the stations wheel. With half a Raspberry Pi 3 plastic case, we fixed the small computer to the metal base.
Both rotary encoders are fixed to the radio wall using a small, custom-made of wood, a nut and a bolt. The original controls are mounted on top of the rotary encoders, from the other side.
And the final touch: we returned some of the old condensators to their original place on the board, to keep a little bit of that vintage feeling.
We sanded the exterior of the radio completely to smooth the surface and remove the original paint. Then we carefully painted the edges with black paint and varnish the rest with matte varnish.
A nice discovery after removing the paint: the wood has a beutiful, symetrical pattern around the controls and dial of the radio. For some reason, this had been covered with paint.
Luckily, the fabric in the front was intact, we didn’t need to touch it.
And - tadaaah - here is the final result:
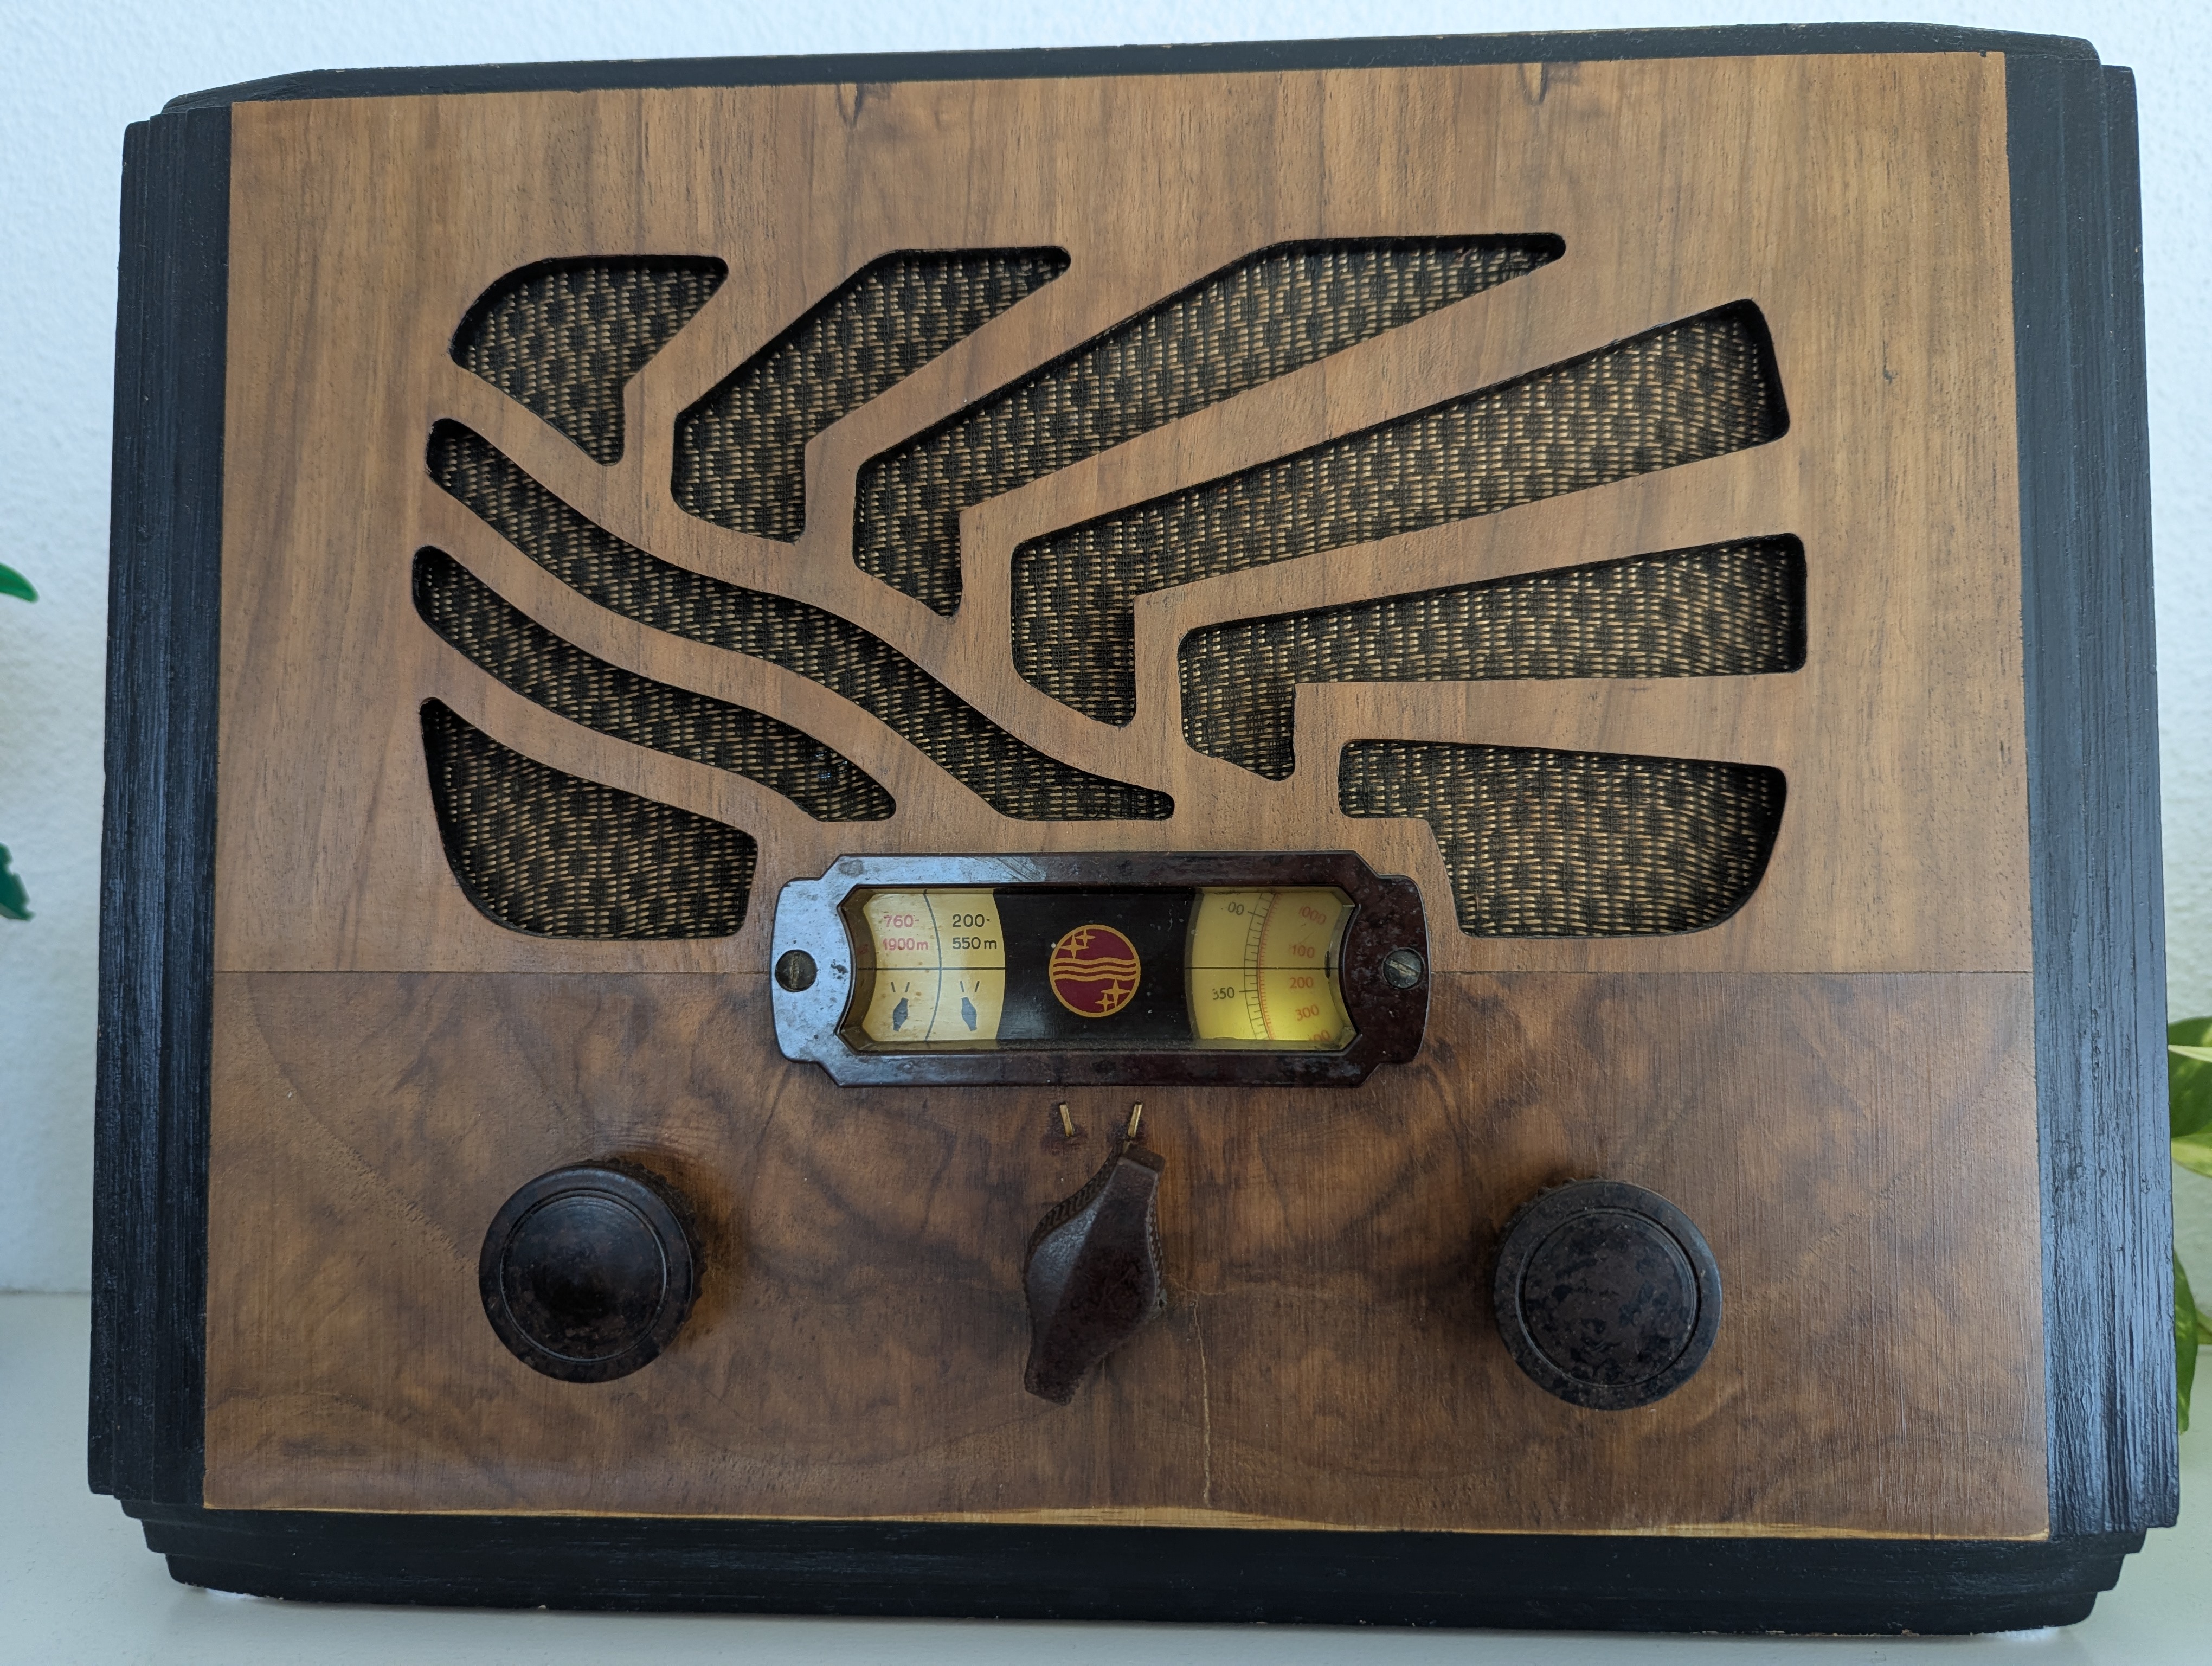
It’s September 2025 when I’m finally wrapping up this writing, the Philips 521AR is keeping me company, playing music, its beautiful display illuminated by a warm, dark yellow light. I imagine it looking not so differently a century ago, with the whole family gathered around the kitchen table, listening with attention to the news…
Radio Museum has been a valuable source of information about vintage radios.
The Philips 521a in the Radio Museum website: https://www.radiomuseum.org/r/philipsib_521a.html
The Philips 521ar, with photographs from the outside and inside of the appliances: https://www.radiomuseum.org/r/philipsib_521ar.html
I found the old Philipps catalog here: https://www.radiomuseum.org/forum/receptores_philips_1936.html
The invicta 5428, dating from 1956, the model I suspect the replaced pieces come from, since the back of the radio seems to have been replaced by the one of this model: https://www.radiomuseum.org/r/invicta_5428.html
An interesting additional link is this video of someone who repaired model 521a and made it work with the original pieces: https://www.youtube.com/watch?v=-WgsTaBBQE0
-
No GenAI was used for writing or editing this blog, since the author firmly believes in the beauty of human writing, with all its perfect imperfections.
-
This project took many, many hours, but I didn’t have to do everything alone: the assembling, wiring and outside restoration of the radio was a team-of-two effort.