 Small Technical Blog
Home-made K8s Cluster
Goal:
Set up a home Kubernetes cluster with old hardware: 1 Master and 1 Worker
Tasks:
- Find old hardware
- Install Ubuntu Server 18.04 LTS
- Set up Master Node
- Set up Worker Node
- Service Account
- Install helm
- Install ingress
- Install cert-manager
- Cluster Issuer (Let’s Encrypt)
- Storage
Since kubernetes is lightweight and can run almost everywhere, I decided to go down to the cellar and rescue some old PC which I thought could still work for this. That’s what I found:
- A MAC Mini Server from year 2009. Two 500GB disks. A still working grub bootloader told me I had a MacOS, an Ubuntu and two Debian distributions installed on the machine. This computer had 4GB RAM. I removed one of the disks, which was broken. One 500GB disk is more than enough for the Master anyway.
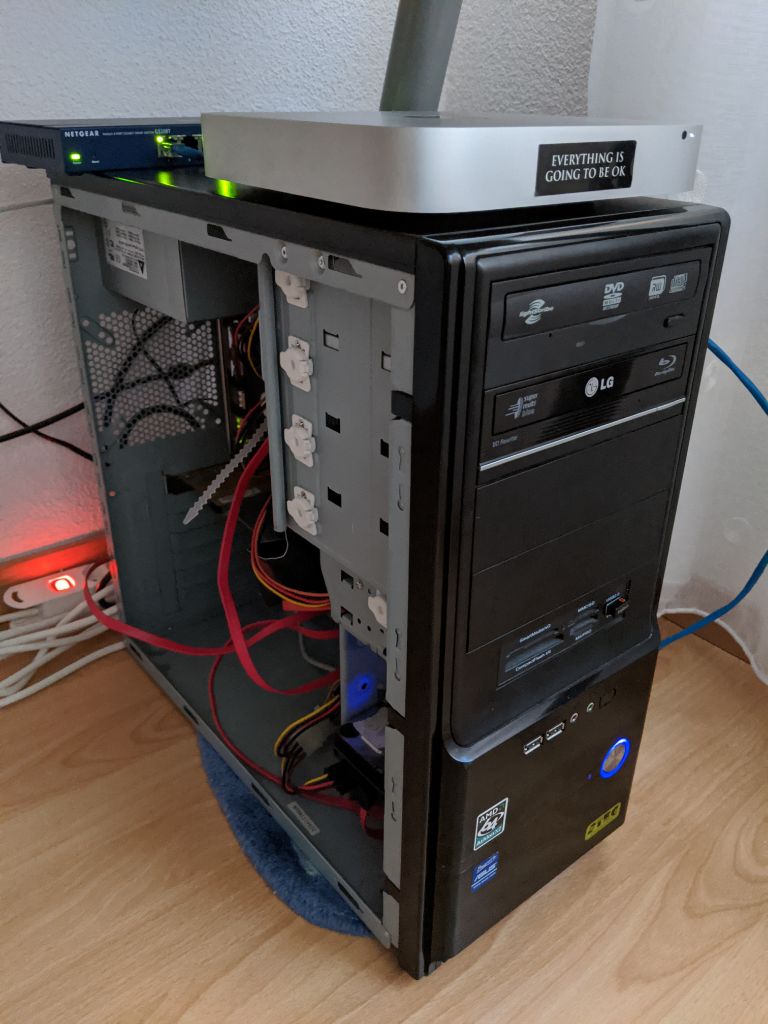
- A PC tower whose components were bought separately and which I proudly assembled myself in 2007. Refurbished through the years, this PC had 6GB RAM and three hard disks: 250GB, 500GB and 2TB. Over the two first disks I had a LVM system installed, with a Debian installation and two separated home partitions. The PC didn’t boot anymore, since the first disk - hosting the Master Boot Record - was broken. I removed the broken disk and the second LVM disk, keeping only the 2TB disk on the machine.
So I thought the MAC Mini should be my Master and the PC Tower should be my Worker :)
I decided to install the newest Ubuntu Server version with Long Term Support (LTS) on both machines. An alternative could have been to install the latest Debian stable.
Download Ubuntu Server 18.04.4 LTS from https://ubuntu.com/download/server
For the MacMini, I just created a bootable USB.
Insert an USB drive and find out which device is it mapped to:
sudo dmesg |grep sd
...
[24400.755280] sd 4:0:0:0: [sdb] Attached SCSI disk
[24406.001628] EXT4-fs (sdb1): mounted filesystem with ordered data mode. Opts: (null)
[39200.249434] sd 4:0:0:0: [sdb] 31266816 512-byte logical blocks: (16.0 GB/14.9 GiB)
...
It was /dev/sdb. So I copied the downloaded image to the USB drive:
sudo dd if=ubuntu-18.04.4-live-server-amd64.iso of=/dev/sdb
For the old PC, I had to burn a DVD, since it was so old it did not even boot from USB. For that I borrowed a quite old Windows laptop which still had a DVD-drive. I burned the ISO image using the Windows Disc Image Burner.
After having the media prepared, I installed Ubuntu Server on both machines. In both cases, I chose “Manual” for setting up the disks and the partitions, using the whole disk.
NOTE: swap is not supported. Either it must be omitted during installation, or it must be switched off afterwards:
sudo swapoff -a
I searched for a suitable container runtime to install, gettin two results which made sense for me:
eramon@caipirinha:~/dev/techblog$ apt-cache search docker.io
containerd - open and reliable container runtime
docker.io - Linux container runtime
...
Although containerd would be enough, I installed docker.io since having the extra docker tools for debugging or whatever might be useful later:
sudo apt-get install docker.io
Install kubeadm, kubectl and kubelet
sudo apt-get update
sudo apt-get install -y apt-transport-https curl

curl -s https://packages.cloud.google.com/apt/doc/apt-key.gpg | sudo apt-key add -
sudo vi /etc/apt/sources.list.d/kubernetes.list
Add:
deb https://apt.kubernetes.io/ kubernetes-xenial main (probably not good, I have bionic) There is no kubernetes-bionic under packages.cloud.google.com/apt/dists
sudo apt-get update
sudo apt-get install -y kubelet kubeadm kubectl
sudo apt-mark hold kubelet kubeadm kubectl
kubelet, kubeadm and kubectl are set on hold (to avoid automatic updates, I think)
After installation, restarting kubelet is required;
sudo systemctl daemon-reload
sudo systemctl restart kubelet
The goal was to set up a single control-plane cluster with kubeadm.
sudo kubeadm init --pod-network-cidr=10.244.0.0/16
...

Your Kubernetes control-plane has initialized successfully!

To start using your cluster, you need to run the following as a regular user:

  mkdir -p $HOME/.kube
  sudo cp -i /etc/kubernetes/admin.conf $HOME/.kube/config
  sudo chown $(id -u):$(id -g) $HOME/.kube/config

You should now deploy a pod network to the cluster.
Run "kubectl apply -f [podnetwork].yaml" with one of the options listed at:
  https://kubernetes.io/docs/concepts/cluster-administration/addons/

Then you can join any number of worker nodes by running the following on each as root:

kubeadm join 192.168.1.129:6443 --token jn333p.q9hskm01cs12iak7 \
    --discovery-token-ca-cert-hash sha256:0966963ed31ac9d898e3d49d154e2f6ed78931f356af5d6c35616ee75585c2f9
To make kubectl work for your non-root user, run these commands, which are also part of the kubeadm init output:
eramon@pacharan:~$ sudo mkdir -p $HOME/.kube
eramon@pacharan:~$ sudo cp -i /etc/kubernetes/admin.conf $HOME/.kube/config
eramon@pacharan:~$ sudo chown eramon:eramon .kube/config
After these steps, looking at the output of kubectl cluster-info we see kubectl is interacting with our new cluster:
eramon@pacharan:~$ kubectl cluster-info
Kubernetes master is running at https://192.168.1.129:6443
KubeDNS is running at https://192.168.1.129:6443/api/v1/namespaces/kube-system/services/kube-dns:dns/proxy
As the output of kubeadm said, we must deploy a pod network to the cluster, so the pods can communicate with each other.
eramon@pacharan:~$ kubectl apply -f https://raw.githubusercontent.com/coreos/flannel/master/Documentation/kube-flannel.yml
podsecuritypolicy.policy/psp.flannel.unprivileged created
clusterrole.rbac.authorization.k8s.io/flannel created
clusterrolebinding.rbac.authorization.k8s.io/flannel created
serviceaccount/flannel created
configmap/kube-flannel-cfg created
daemonset.apps/kube-flannel-ds-amd64 created
daemonset.apps/kube-flannel-ds-arm64 created
daemonset.apps/kube-flannel-ds-arm created
daemonset.apps/kube-flannel-ds-ppc64le created
daemonset.apps/kube-flannel-ds-s390x created
Show all pods from all namespaces:
eramon@pacharan:~$ kubectl get pods --all-namespaces
NAMESPACE     NAME                               READY   STATUS    RESTARTS   AGE
kube-system   coredns-6955765f44-597bj           1/1     Running   0          160m
kube-system   coredns-6955765f44-ctwvs           1/1     Running   0          160m
kube-system   etcd-pacharan                      1/1     Running   0          160m
kube-system   kube-apiserver-pacharan            1/1     Running   0          160m
kube-system   kube-controller-manager-pacharan   1/1     Running   0          160m
kube-system   kube-flannel-ds-amd64-dhc7f        1/1     Running   0          62s
kube-system   kube-proxy-qcv98                   1/1     Running   0          160m
kube-system   kube-scheduler-pacharan            1/1     Running   0          160m
Flannel was there.
I followed exactly the same process described in 3.1 and 3.2 to install the container runtime and the kubernetes software on the worker node.
First enable docker.service (otherwise kubeadm join shows a warning):
eramon@whisky:~$ sudo systemctl enable docker.service
Created symlink /etc/systemd/system/multi-user.target.wants/docker.service → /lib/systemd/system/docker.service.
Since more than 24 hours elapsed between the kubeadm init and the join command, I created a new token:
eramon@pacharan:~$ kubeadm token create
W0321 15:00:44.641034   18998 validation.go:28] Cannot validate kube-proxy config - no validator is available
W0321 15:00:44.641111   18998 validation.go:28] Cannot validate kubelet config - no validator is available
qon04q.9lwkz7i4pixr46q6
eramon@pacharan:~$ kubeadm token list
TOKEN                     TTL         EXPIRES                USAGES                   DESCRIPTION                                                EXTRA GROUPS
qon04q.9lwkz7i4pixr46q6   23h         2020-03-22T15:00:44Z   authentication,signing   <none>                                                     system:bootstrappers:kubeadm:default-node-token
Join worker node by running the following as root:
root@whisky:/home/eramon# kubeadm join 192.168.1.129:6443 --token qon04q.9lwkz7i4pixr46q6 --discovery-token-ca-cert-hash sha256:0966963ed31ac9d898e3d49d154e2f6ed78931f356af5d6c35616ee75585c2f9
W0321 15:03:52.406236   29903 join.go:346] [preflight] WARNING: JoinControlPane.controlPlane settings will be ignored when control-plane flag is not set.
[preflight] Running pre-flight checks
        [WARNING IsDockerSystemdCheck]: detected "cgroupfs" as the Docker cgroup driver. The recommended driver is "systemd". Please follow the guide at https://kubernetes.io/docs/setup/cri/
[preflight] Reading configuration from the cluster...
[preflight] FYI: You can look at this config file with 'kubectl -n kube-system get cm kubeadm-config -oyaml'
[kubelet-start] Downloading configuration for the kubelet from the "kubelet-config-1.17" ConfigMap in the kube-system namespace
[kubelet-start] Writing kubelet configuration to file "/var/lib/kubelet/config.yaml"
[kubelet-start] Writing kubelet environment file with flags to file "/var/lib/kubelet/kubeadm-flags.env"
[kubelet-start] Starting the kubelet
[kubelet-start] Waiting for the kubelet to perform the TLS Bootstrap...

This node has joined the cluster:
* Certificate signing request was sent to apiserver and a response was received.
* The Kubelet was informed of the new secure connection details.

Run 'kubectl get nodes' on the control-plane to see this node join the cluster.
As instructed by the output of the last command, we take a look at the nodes:
eramon@pacharan:~$ kubectl get nodes
NAME       STATUS   ROLES    AGE     VERSION
pacharan   Ready    master   3d3h    v1.17.4
whisky     Ready    <none>   6m15s   v1.17.4
To interact with the Kubernetes cluster from a client machine, for now we’ll use the default service account token.
Service accounts are users managed by the Kubernetes cluster and tied to a set of credentials stored as Secrets, which are mounted into pods allowing in-cluster processes to talk to the Kubernetes API.
On the client machine
Download binary and install kubectl on the client machine:
eramon@caipirinha:~/dev/kubernetes$ curl -LO https://storage.googleapis.com/kubernetes-release/release/`curl -s https://storage.googleapis.com/kubernetes-release/release/stable.txt`/bin/linux/amd64/kubectl
  % Total    % Received % Xferd  Average Speed   Time    Time     Time  Current
                                 Dload  Upload   Total   Spent    Left  Speed
100 41.4M  100 41.4M    0     0  5681k      0  0:00:07  0:00:07 --:--:-- 5877k

eramon@caipirinha:~/dev/kubernetes$ chmod +x kubectl

eramon@caipirinha:~/dev/kubernetes$ sudo mv kubectl /usr/local/bin/kubectl
I just copied the kube configuration from the Master node to my laptop.
NOTE: Not sure if this is exactly best practice.
The file is located here:
eramon@pacharan:~$ ls -la /home/eramon/.kube/config
-rw------- 1 eramon eramon 5449 Mar 18 14:42 /home/eramon/.kube/config
After copying the file to the same location on the client machine, I saw my laptop had access to the Kubernetes API on the server via kubectl:
eramon@caipirinha:~$ kubectl cluster-info
Kubernetes master is running at https://192.168.1.129:6443
KubeDNS is running at https://192.168.1.129:6443/api/v1/namespaces/kube-system/services/kube-dns:dns/proxy
Helm is a tool for managing Kubernetes packages called charts. The chart is a bundle of information necessary to create an instance of a Kubernetes application.
Downloaded latest helm:
eramon@caipirinha:~/dev/helm$ wget https://get.helm.sh/helm-v3.1.2-linux-amd64.tar.gz
--2020-03-22 13:12:45--  https://get.helm.sh/helm-v3.1.2-linux-amd64.tar.gz
Resolving get.helm.sh (get.helm.sh)... 2606:2800:233:1cb7:261b:1f9c:2074:3c, 152.199.21.175
Connecting to get.helm.sh (get.helm.sh)|2606:2800:233:1cb7:261b:1f9c:2074:3c|:443... connected.
HTTP request sent, awaiting response... 200 OK
Length: 12269190 (12M) [application/x-tar]
Saving to: ‘helm-v3.1.2-linux-amd64.tar.gz’

helm-v3.1.2-linux-amd64. 100%[==================================>]  11.70M  2.53MB/s    in 4.6s

2020-03-22 13:12:51 (2.53 MB/s) - ‘helm-v3.1.2-linux-amd64.tar.gz’ saved [12269190/12269190]
Unzip it and instal binary:
eramon@caipirinha:~/dev/helm$ tar -zxvf helm-v3.1.2-linux-amd64.tar.gz
linux-amd64/
linux-amd64/helm
linux-amd64/README.md
linux-amd64/LICENSE

eramon@caipirinha:~/dev/helm$ sudo mv linux-amd64/helm /usr/local/bin/helm
Invoke helm to make sure it’s working:
eramon@caipirinha:~$ helm version
version.BuildInfo{Version:"v3.1.2", GitCommit:"d878d4d45863e42fd5cff6743294a11d28a9abce", GitTreeState:"clean", GoVersion:"go1.13.8"}
Once Helm is ready, add the official “Helm stable charts” chart repository:
eramon@caipirinha:~$ helm repo add stable https://kubernetes-charts.storage.googleapis.com/
"stable" has been added to your repositories
My cluster needed an ingress controller in order to listen and serve connection requests.
Since I’m working with a home-made cluster installed directly on physical machines running on my home network, the default nginx-ingress configuration won’t work for me. On a home configuration there is no load balancer on-demand as with a cloud provider.
Taking a “bare-metal’ cluster configuration as a reference, this is the setup for my ingress controller:
- kind=DaemonSet: deploy the ingress controler on every node
- hostNetwork=true: the nginx daemonset runs on the host namespace
- service.enabled=false: no service will be created, since we are using DaemonSet
- admisionWebhooks.enabled=false: we don’t want to have ingress admission webhooks
Install nginx-ingress using helm:
helm install mynginx1 stable/nginx-ingress \
	--set controller.admisionWebhooks.enabled=false \
	--set controller.service.enabled=false \
	--set controller.hostNetwork=true \
        --set controller.kind=DaemonSet
The issuance, renewal and configuration of TLS server certificates for web applications deployed in the cluster can be automated with Let’s Encrypt and cert-manager.
Install cert-manager from manifest (rather as using helm):
eramon@caipirinha:~/dev/kubernetes$ kubectl apply --validate=false -f https://github.com/jetstack/cert-manager/releases/download/v0.14.3/cert-manager.yaml
The cert-manager is installed in an own new namespace called cert-manager.
To make sure cert-manager was installed correctly, list the pods on the namespace:
eramon@caipirinha:~/dev/techblog$ kubectl get pods -n cert-manager
NAME                                      READY   STATUS    RESTARTS   AGE
cert-manager-77fcb5c94-dfgjm              1/1     Running   0          58m
cert-manager-cainjector-8fff85c75-nmmhn   1/1     Running   0          58m
cert-manager-webhook-54647cbd5-w4fkr      1/1     Running   0          58m
If the cert-manager, the cainjector and the webhook are up and running, we should be good.
Issuers (and ClusterIssuers) represent a certificate authority from which signed x509 certificates can be obtained. A ClusterIssuer is necessary to issue certificates with cert-manager and Let’s Encrypt.
I used a DNS01 challenge with an api token provided by Cloudflare.
NOTE: A DNS01 solver with acme version 2 is mandatory for issuance of wildcard certificates.
ClusterIssuer: letsencrypt-prod.yaml.example
There are many different kinds of persistent volumes for K8s. One of them is a NFS server.
Setting up the NFS share on the Synology NAS was quite straightforward.
I installed nfs-common on my worker node:
sudo apt-get install nfs-common
With this, the worker will be able to nfs-mount folders on my NAS as persistent volumes for the pods.
Note: not sure if this is best practice. I guess for productive setups required software is installed on each node automatically.
After the NFS share was available on my NAS, I wrote manifests for persistent nfs volumes. I created a dedicated persistent volume for each application.
The manifest reference the hostname or IP of the NFS server and the path to the share:
apiVersion: v1
kind: PersistentVolume
metadata:
  name: synology-nfs
spec:
  capacity:
    storage: 10Gi
  storageClassName: standard
  accessModes:
  - ReadWriteMany
  nfs:
    server: myServerIP
    path: /path/to/share
After all these preparations, my new cluster was ready for its first deployment :)
In both master and worker, I get this warning:
[WARNING IsDockerSystemdCheck]: detected "cgroupfs" as the Docker cgroup driver. The recommended driver is "systemd". Please follow the guide at https://kubernetes.io/docs/setup/cri/
When running kubeadm init and when creating a new token, I got warnings on the output:
eramon@pacharan:~$ kubeadm token create
W0321 15:16:13.144929   25354 validation.go:28] Cannot validate kube-proxy config - no validator is available
W0321 15:16:13.145003   25354 validation.go:28] Cannot validate kubelet config - no validator is available
4w2xrh.i1phnkxkzz7ja5fi